
Most guitar students learn to read guitar tabs and chord charts at about the same time, right after they learn their first guitar chords. Both are fundamental to learning the instrument. Mastering the basics of both will take you halfway to playing well right out of the gate! They are pretty simple, and you’d be silly not to learn how to read guitar chord charts, you burgeoning rocker you. So let me help you hammer out the tools necessary to read them.

Table of Contents
How to Read Chord Charts
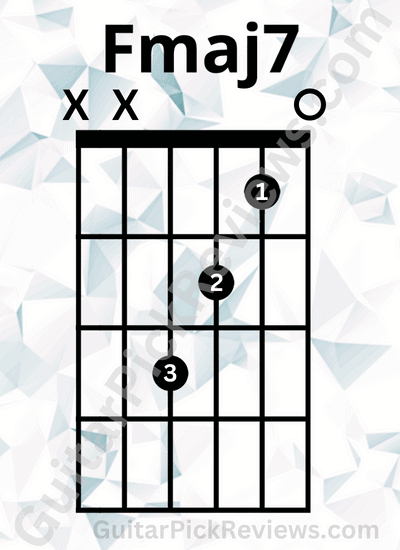
First, know what a chord chart (or diagram) looks like. Here are a few samples, just in case your memory is hazy:


What do Guitar Chord Charts Consist of?
Though they look dense, these chord charts of an F#7 and an Fmaj7 are easy to read, at least when you know how to read them. To begin with, you can already see that a chord diagram is composed of vertical and horizontal lines, and three types of marks: black and white circles and an X. Let’s talk about them.
The Vertical and Horizontal Lines on Chord Charts
The vertical lines of the chord chart are direct representations of the strings of a guitar. The horizontal lines are fret markers, showing you on which fret to fret the note. The first line of the chord diagram, that’s the one at the very top, is often bolded or doubled up, in this case, to represent the nut. This is that plastic piece between the neck and the headstock. Chord diagrams often use the nut as a baseline, especially with open chords, which are played directly beside the nut. More on this later, though.
The Note Marks
Notes are usually shown as circles, often with numbers to represent the fingers. They will always be placed on the string and the fret they are to be played. Above some of the strings, you’ll see an X sign. It means that you shouldn’t play this string. Another mark is a circle which is found, too, in both charts. It represents an open string that you play without fingering.
For instance, in the chart for F#7, the first you play is on the second fret on the second string. This note is shown with a 1, indicating that your first finger should be used to play the note.
Visualizing Chord Charts
Now, all of that might have been a little confusing, so to help yourself visualize how the different lines correspond to a guitar, grab the nearest one you can find and hold it out in front of you. If the neck and body are facing you, just by looking at the strings you can instantly grasp the intuitive nature of reading a chord diagram. The low E string of the guitar-assuming you’re in standard tuning-will be on your left, just as it is in the chord diagram. Conversely, the high E is on the right, and all the strings in between are exactly as they are on the actual guitar in your hand.
At the top of the neck, the nut forms a bolded line at which the strings end, just like the bold line on the chord diagram. This is a simple yet highly effective way to think about reading chord diagrams. And if you get confused while trying to voice a chord, just remember how the neck looked as you held it out.
From here, reading the diagram is fairly simple. To emulate the chord on the diagram, just place your fingers on the strings and frets shown.
Compare How They Sound
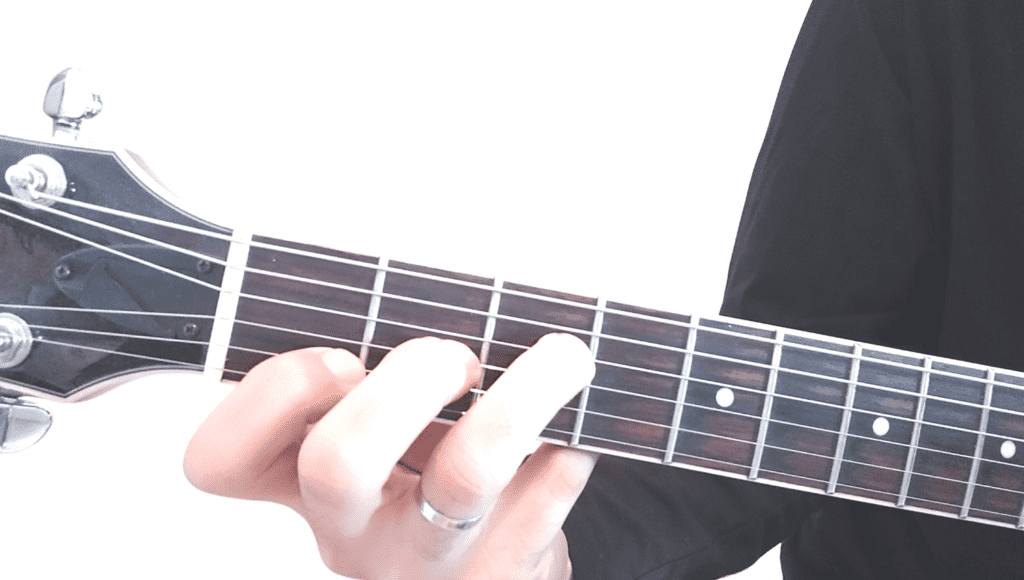
Play the Fmaj7 chord, does it sound like this?
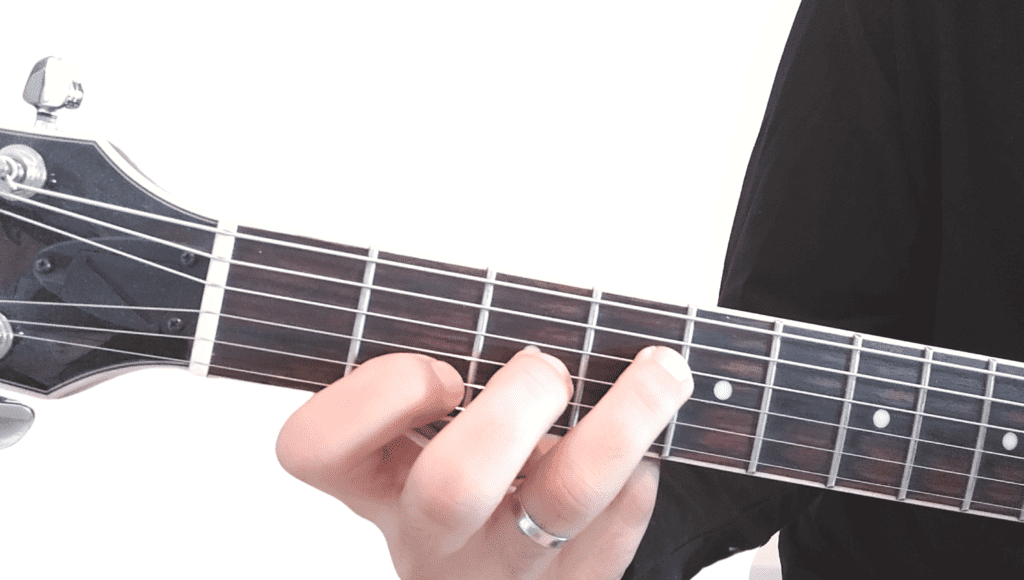
Now, let’s try F#7, does it sound like the example below?
If they do, well done, you’ve made it. If not, don’t feel bad, figure out which note is “off” and fix it. But, if your fingering is correct, tune your guitar and try again.
Fingering Suggestion on Chord Charts
Let’s talk briefly about those numbers in the two examples. At first glance, you might think they’re numbered by what fret they’re on, but actually, each number directly corresponds to a finger on the hand.
This number system begins with the index finger, which is number 1 and ends with the pinky, which is 4. If you get finger tangled while trying to learn a chord, look for these numbers. They will always tell you exactly which finger goes where, and can save you a lot of pain. However, not all chord diagrams will have these, so don’t be afraid to think it out. Always go with what’s easiest on the fingers but still sound the notes with clarity.
Learn More Chords
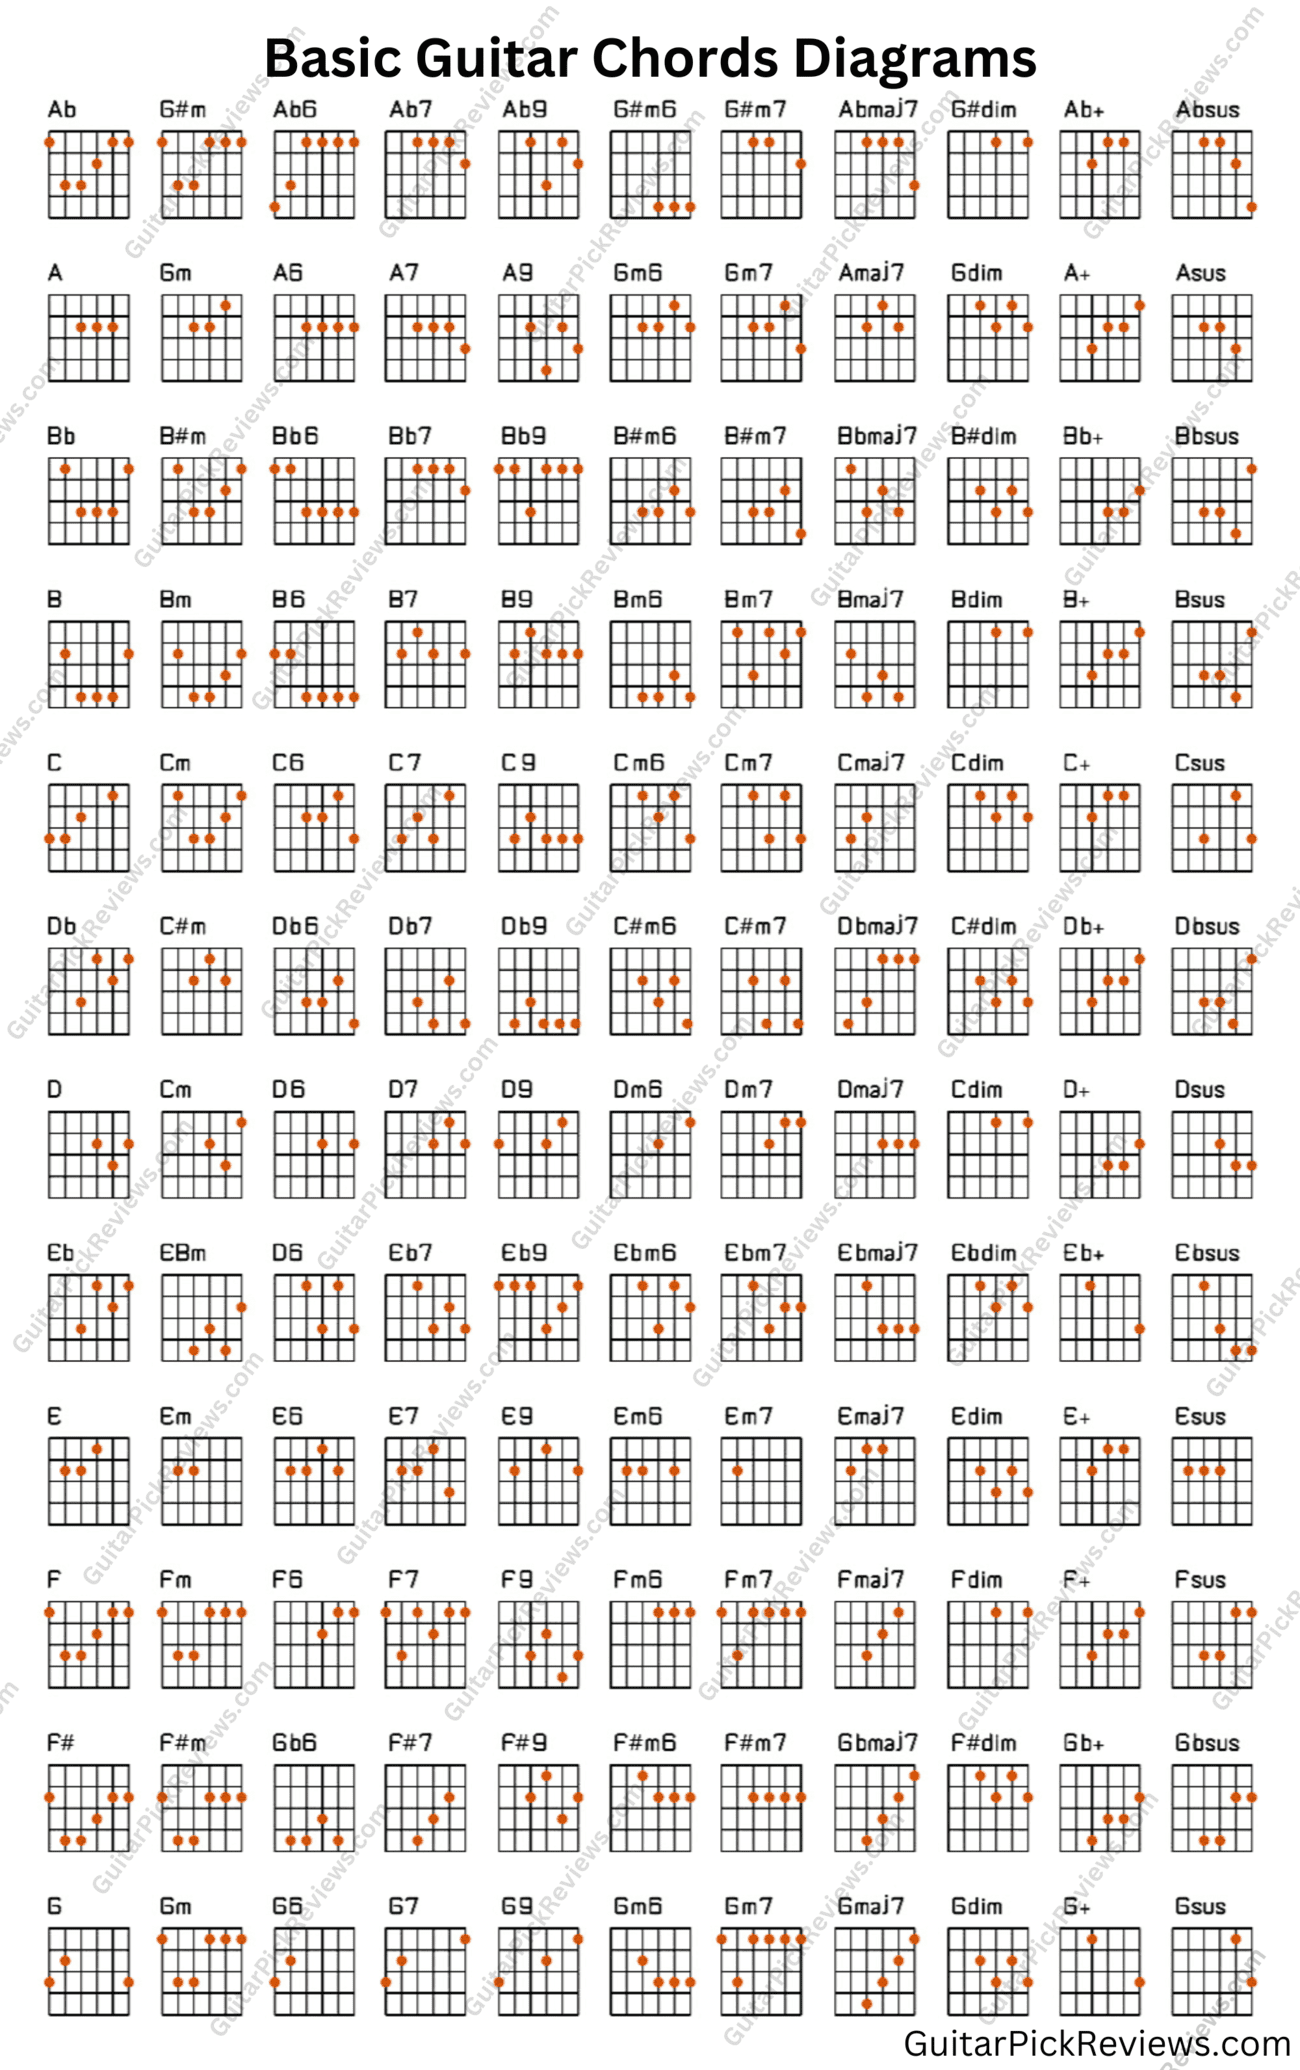
You got this far, meaning you already know how to read guitar chord charts. Well done! This will come in handy when you learn new songs and need to learn a new chord. But to prevent that, here are chord charts for 132 guitar chords for you to memorize.
Finishing Thoughts
That’s all there is to it! It might sound confusing now, but spend a little time with chord charts. Feel free to use the ones above and a guitar, and I promise you’ll be reading like a champ in no time. Keep in mind that reading chord charts is great, but memorizing chords is even better. When you don’t have to rely on chord books to carry you through, you’ll find playing guitar both easier and more fun.
As always, practice will help with both your reading and your playing. Happy strumming, now get out there and play! If you liked this lesson, we have tons of other free guitar lessons, for you to browse through.
I loved that you called the lines fret markers. People make the mistake of thinking they have to put their finger JUST behind the metal “fret markers” the fret as far as I’m concerned is the space between the fret markers