Guitar mods are a great way of making your guitar your own. Anywhere between installing a new bridge, B-bender, or changing the nut. Some are complex, and some even require a guitar tech to do, but there are some very simple guitar mods you can perform by yourself. Being relatively simple doesn’t mean they are less good, and as you’ll see below, they are very effective in achieving what they were designed for.
Table of Contents
What Are Guitar Mods
Guitar mods (or guitar modifications) include any form of change or customization you can make to your guitar. Some guitar mods are aimed at playability, some revolve around the sound, and some are purely aesthetic.
Why Should You Mod Your Guitar
As I said before, modifying your guitar will help you make your guitar your own. Modifying your guitar to fit your playing style, makes it work better for you. But that’s not all, by getting your hands dirty and figuring things up as you go, you’ll learn to know your instruments better. If you want to change something, you must understand how it works, and once you understand how things work, you become better at using them.
10 Easy Guitar Mods And Upgrades
There are literally thousands of different guitar mods you can do to your guitar. Today, I’m looking at 10 different guitar modifications that are very useful or unique and very simple to pull off, even if this is your first time attempting anything like that.
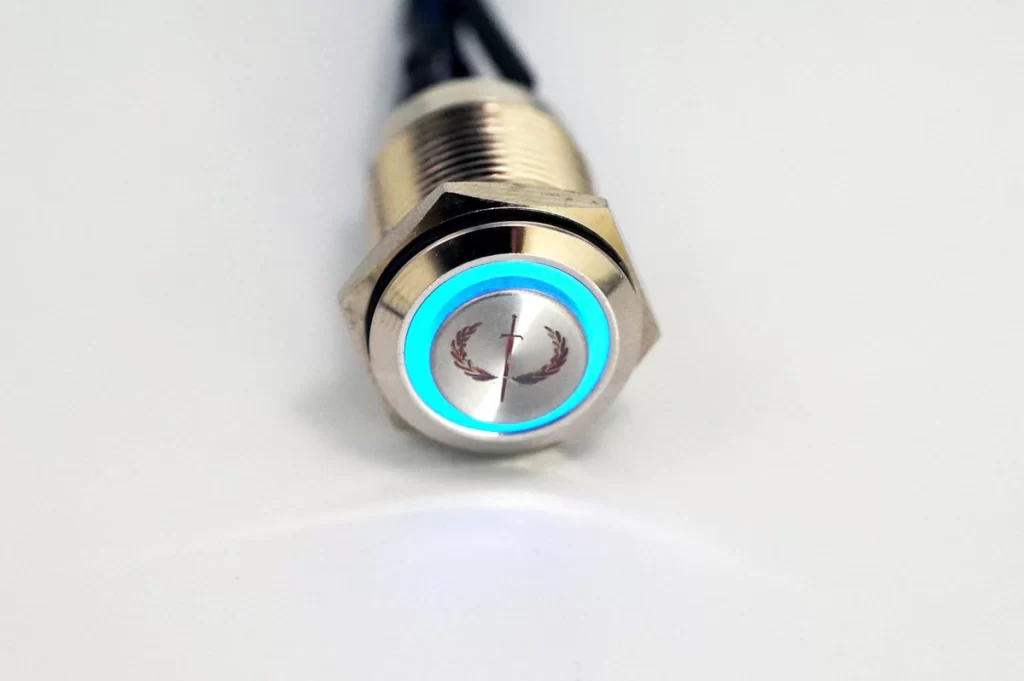
#1: Add A Killswitch
Killswitch is a guitar mod that temporarily mutes the guitar when pressed and unmutes it when released. They do it by sending the signal to the ground instead of the output jack. You can add a killswitch to any electric guitar, so there’s absolutely nothing that stops you from trance-gate your Epiphone Broadway if you really wanted to. That being said, a killswitch is most commonly used on high gain settings.
Types of Killswitches
There are essentially 2 types of killswitches, and they both work in the same way:
- Standard Killswitch – Requires drilling.
- Mini Killswitch – Can be installed instead of one of the knobs, eliminating the need for drilling.
I’m using a standard killswitch I got from Iron Age a few years ago. I feel very comfortable recommending it because I had it for 5-6 years and never had any problems with it. That being said, if you prefer replacing one of the knobs to save yourself the need to put an extra hole in your guitar, you should try the mini killswitch. It’s true that all killswitches work the same, but in all honesty, I don’t see myself switching from Iron Age for a few reasons:
- They are the ones who came up with that idea, making them the most experienced manufacturer.
- The price difference is not that big, and to get a product that is that superior for such a low difference in cost is a no-brainer for me.
- The installation instructions and support you’ll get from them are unparallel.
Check out Iron Age’s kill switches on Amazon
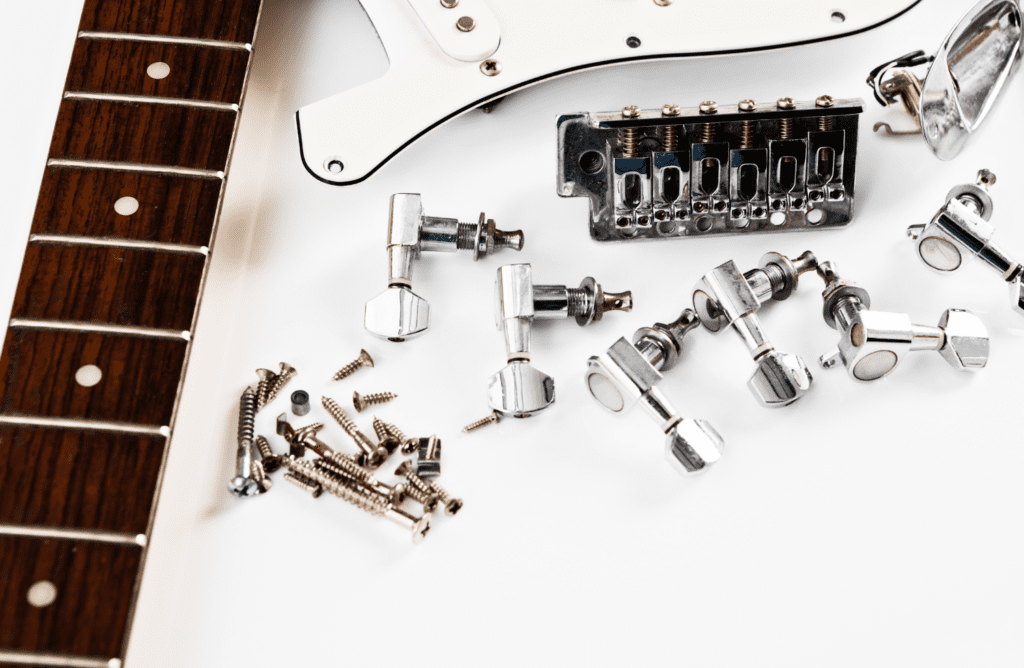
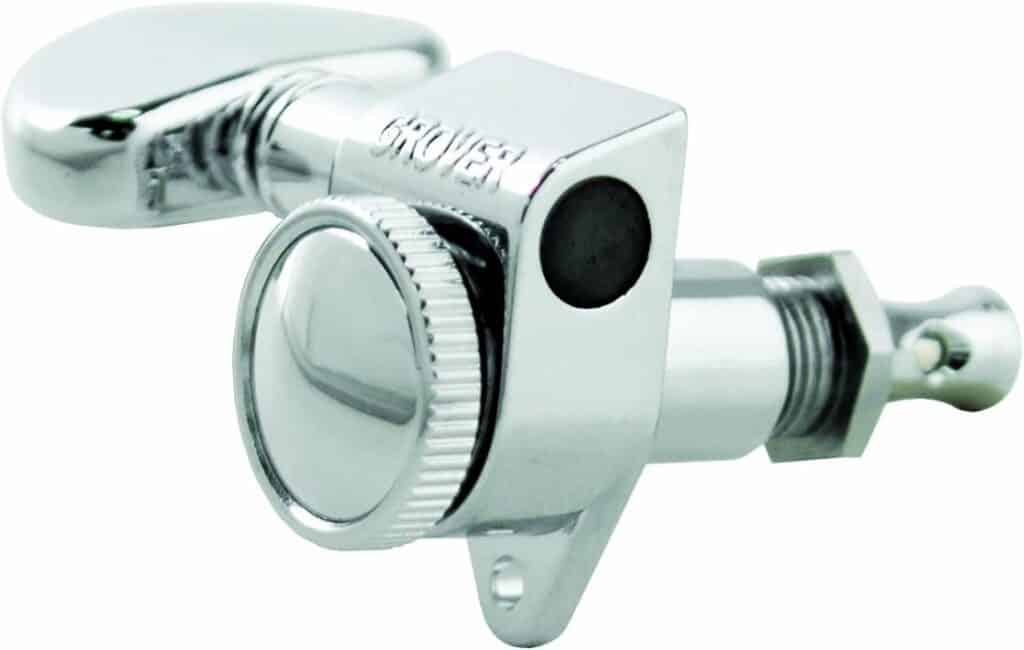
#2: Replace The Tuners
It may seem like the tuners have no effect on a guitar’s playability, but let me tell you this: If you decide to do any type of guitar mod, let it be replacing your tuners with locking tuners. It’s very simple to do, it’s not too expensive, and it will have a huge impact on your guitar’s tuning stability.
There are a few different types of guitar tuners, including Sealed tuning pegs (most common), Lock-in tuners, Closed / Open back vintage tuners, and staggered posts.
Grover is a great place to start in my opinion. Their tuners are well made and come as stock on many high-end guitars such as Les Pauls and SGs.
#3: Upgrade The Nut
I previously mentioned that upgrading the nut is one of the cheapest ways to improve the tone of your acoustic guitar. But upgrading the nut plays a huge role in the sustain of your electric guitar, and in its overall tone, too.
Different Materials Of Guitar Nuts
There are a few different guitar nuts materials you can choose from and each of them has its own characteristics and advantages. For the sake of simplicity and ease of installation, I’m going to recommend only standard nuts, even though upgrading your locking nut shouldn’t be a big challenge.
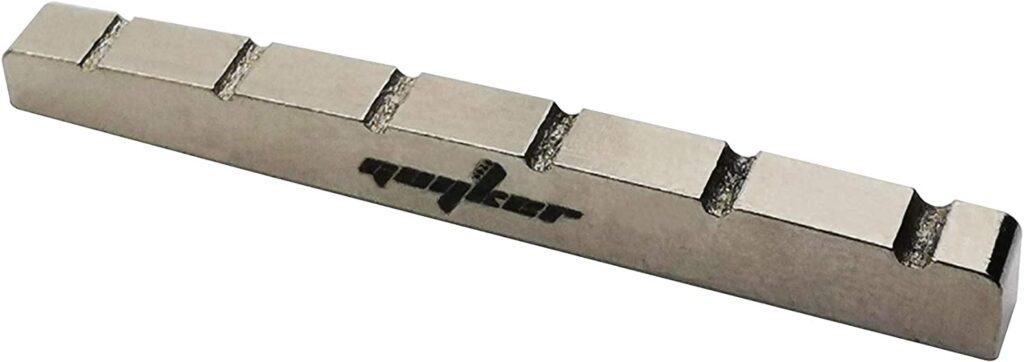
- Bone nuts: Found on many high-end guitars, and for a good reason. Bone is very hard but is still very easy to work with (if you need to slot, sand, or reshape it a bit). It sounds bright and consistent, has some self-lubricating characteristics, and will help your guitar stay in tune for longer periods of time. Here are a few Bone nuts you can try (just make sure the string spacing fits your guitar).
- Metal nuts: Usually made of Brass, but often made of Steel or Titanium, too. Metal nuts are known for their superior sustain and bright tone and are the most durable nuts on this list. My personal favorite of the metals is Brass because it’s a bit warmer than either Steel or Titanium. One thing to bear in mind when it comes to metal nuts is that it’s always better to go for an adjustable one because they’re so hard to sand down if needed.
- Wooden nuts: Usually made of Ebony and used on acoustic guitars, wooden guitar nuts sound warm (my personal favorite sounding nut), but lack some durability and stability you get from other materials mentioned here (still better than plastic, though). Another thing about them is the looks – they are absolutely stunning.
- Graphite nuts: Graphite is a synthetic material, known for its self-lubricating properties and tuning stability. If you’re a heavy bender or like to abuse your tremolo, this is definitely a nut you should consider.
- TUSQ nuts: TUSQ is a synthetic substitute for Ivory (which is illegal). It is a vegan alternative to Bone and resembles it almost perfectly. It is a good option to consider if you want to have all the benefits of Bone nuts, while still using a synthetic material.
How To Install A New Guitar Nut
Replacing a guitar nut is a fairly simple task, but it requires some caution. For that, you’ll need a wooden block of some sort, a hammer, a sharp utility knife, thin sandpaper (800 or 1000 grit), a small flat-head screwdriver, and masking tape.
- Remove the strings
- Using the utility knife, score the sides of the nut, where it connects to the wood.
- Gently hit the old nut with the hammer towards the headstock, using the wooden block as a buffer.
- The nut should easily be out right now, but repeat steps 2 and 3 if needed.
- Measure the height of your new nut compared to the old one you removed.
- Start sanding the new nut until it is roughly at the correct height (note that some guitars, like Fenders, have a curved nut slot. In that case you can glue some sandpaper to the fretboard using masking tape, and use its curvature as a guide for the nut).
- Put on some new strings and check the height of the nut every now and then. Be careful to not over-sand it.
- If the new nut has some sharp or rough edges, use sandpaper to shape it, and finish the shaping using thin sandpaper.
- Using a toothpick, put 2 small drops of wood glue on the bottom of the nut, around where the 2nd and 5th strings are.
- Place the nut in place, and tighten the strings so they hold the nut in place. Wait about half an hour and tune your guitar.
#4: Shield The Wiring
If you have single-coil pickups, you know how noisy they can be. And even though playing in positions 2 and 4 can solve it to some extent, that basically makes them humbuckers. 60 Cycle hum is the result of the wiring and pickups catching electric fields from around it. A good and simple way to eliminate it is by creating a Faraday cage. Which is the geeky way of saying: shield it with a conductive material.
Types of Shielding
To shield the wiring of a guitar you’ll need one of 2 types of conductive tape:
- Isotropic Conductive Adhesives (or ICA) – A tape where the adhesive IS conductive
- Anisotropic Conductive Adhesives (or ACA) – A tape where the adhesive IS NOT conductive.
I usually go with ICA, because it makes it a bit easier. But even if all you have is ACA, you can still do it. Just make sure to fold the end of the tape after every strip you put inside the cavity, so the conductive parts will be in contact.
How to Shield Your Guitar
Here’s a video that shows exactly how to do it, it has some good points there, but I want to go over some of the things he got wrong, just for education’s sake.
- He’s a bit overkilling it in terms of grounding the cavity through the knobs because as long as the cavity is connected to the jack, it is grounded, too. The jack is always grounded to begin with.
- There’s absolutely no point in grounding the tremolo because there is nothing electric there. You can do it if you really want to, but it’s essentially like grounding your tuners because they are too, made of metal.
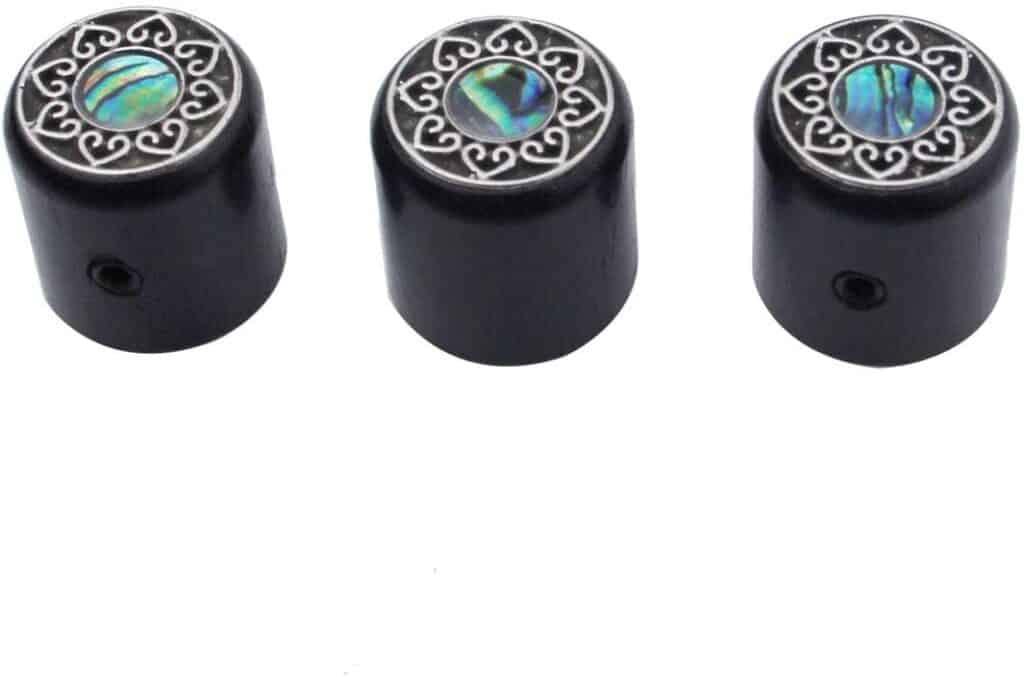
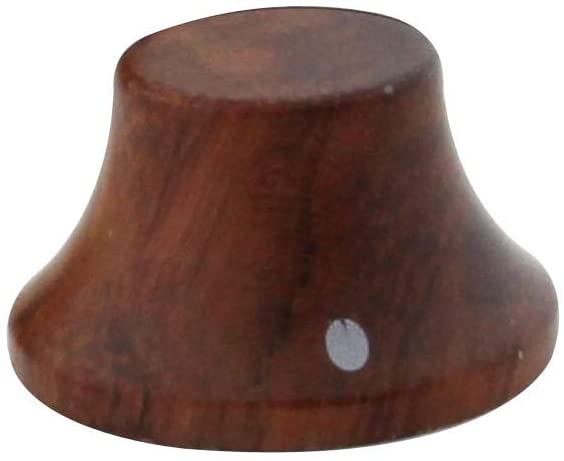
#5: Upgrade The Knobs
A well-made knob can add a lot to the guitar’s looks as well as to its playability. Many low-end or mid-range guitar has some relatively cheap knobs. And even though there’s nothing wrong with that, I bet you noticed too that the volume and tone curves are not so linear. If you haven’t, just play while gradually lowering the volume and you’ll hear a sudden volume drop around the middle.
Cheap knobs also tend to have some cracking. And even though you can easily fix noisy guitar knobs by yourself, it’s a lot better not to have it in the first place. When looking into buying a new set of guitar knobs, you first need to decide if you just want to upgrade the looks, playability, or both.
Just Replacing The Knobs
If you just want them to look good, all you need are the guitar knobs themselves. You can pop them right out with a guitar knob puller. A knob puller is not required but will help avoid scratches on the pickguard or guitar body. Since looks is a matter of taste, all I can do here is to recommend to you some of the brands I’ve tried myself and liked.
- Guyker – Making great quality knobs in many different designs. They have 6mm as well as 6.4mm ones.
- Metallor – Amazing quality for the price. These are not the best knobs out there, but they are more than decent.
- Mxuteuk – Decent quality and a big variety of designs.
Replacing the Wiring, Too: Control Pots
If you want them to play better, too, you need to change the control pots. It’s not that complicated, but it requires some soldering. There are some solderless kits, but I never tried any. For that reason, I can’t recommend any particular one.
Alpha potentiometers are some of the best control pots for guitars, and I really can’t recommend them enough. When buying new control pots, make sure their resistance matches the ones you are currently using, unless you know what you’re doing. Another thing to bear in mind is the type of shaft. Most knobs fit an 18-splice shaft, but if you want to keep your current knobs, make sure the new control pot fits.
Here are their 250K ohm, 500K ohm, and 1M ohm control pots.

#6: Replace The Pickguard
The pickguard is responsible for a lot of a guitar’s appearance. Being so customizable too is making it one of the most common guitar mods these days. There are so many options anywhere that you’re almost guaranteed to find the one you look for. But if you really want to take it to the next level, there are also some very talented artists making custom pickguards too.
The installation process is very simple, which is making it an even bigger no-brainer. Even replacing a Strat-style pickguard is a relatively simple task. There are literally 1000s of different pickguard designs, and you can even find custom ones.
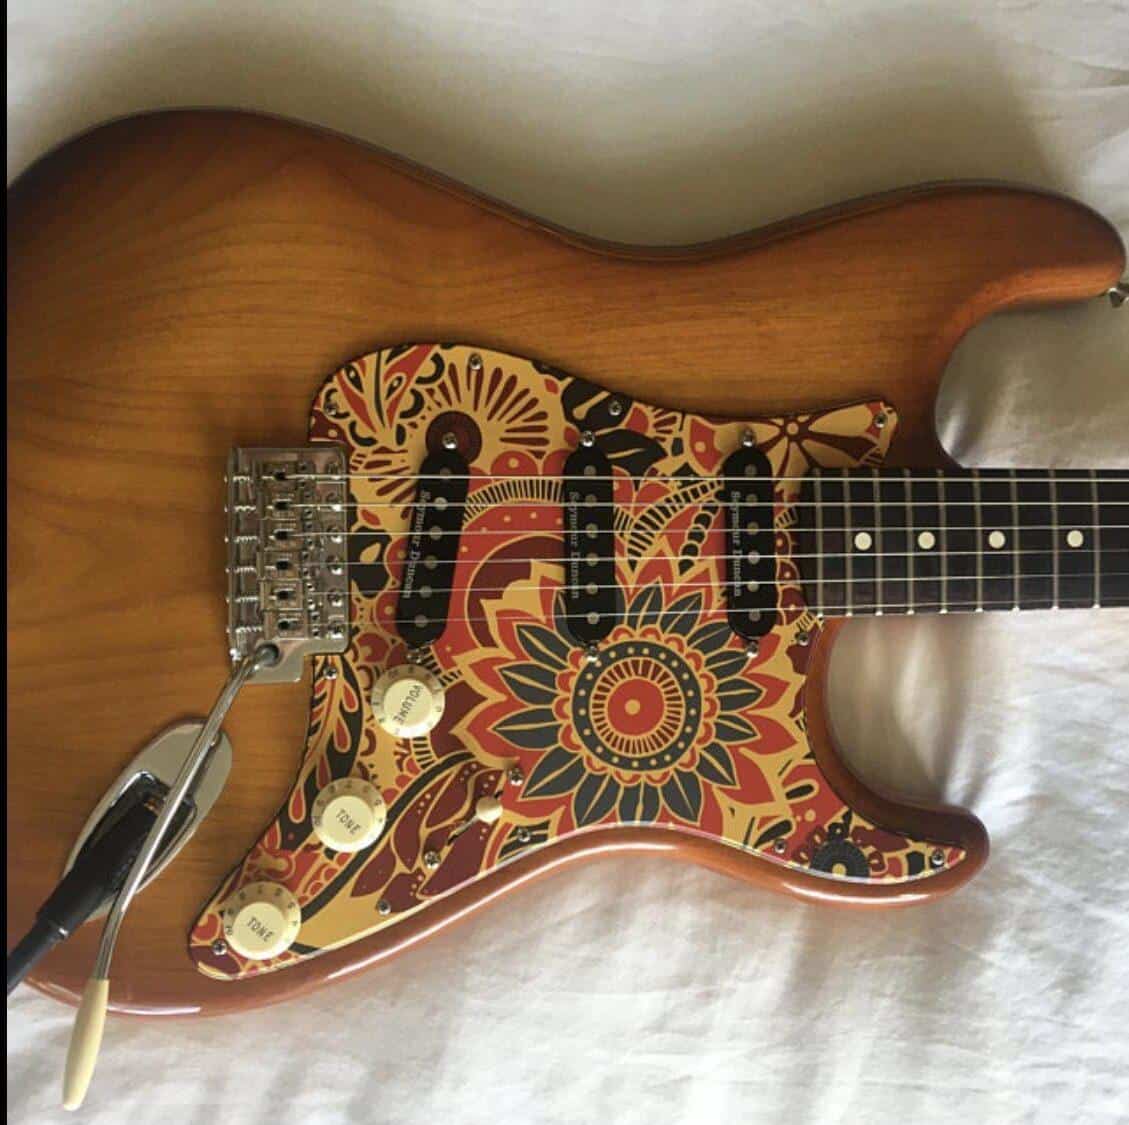
Some pickguards come pre-wired with pickups, so if you decided you want to replace them, this could be a good chance to do it.
#7: Block The Tremolo
A whammy bar is one of the most expressive parts of any guitar, but it comes at the cost of tuning stability. If you don’t use your tremolo, Blocking your tremolo could be one of the best guitar mods you can have. Blocking the tremolo is a very simple thing you can do to improve your experience with your guitar. For that, you just need to place a trem block behind your bridge, and that’s it. There are some different sized for each guitar, but as long as your guitar isn’t too rare, you’ll easily find a trem block that fits.
You can also make one yourself by using a piece of wood. If you have the tools, it might even be a better option for you. It will require some work, but it’s a fun little project.

#8: Install Strap Locks
This is not much of a guitar mod, but it’s definitely an upgrade. If you haven’t installed a set of strap locks on your guitar, just do it. It’s cheap, simple, and will save your guitar an undesired meeting with the floor.
There are a few different types of strap locks, but the most common ones are Clip and Strap-Fitted. Clip locks are very cheap and work like a washer you put on your strap button. Strap-fitted locks, actually replace your strap button completely with a locking mechanism. There’s even a guitar strap that locks itself to the strap buttons.
Clip Strap Locks
Clip strap locks are definitely an improvement over not using strap locks at all, but they are far from being as reliable as Strap fitted ones. There are many manufacturers making this type of strap locks, including Guitar Savers, D’Addario, and more.
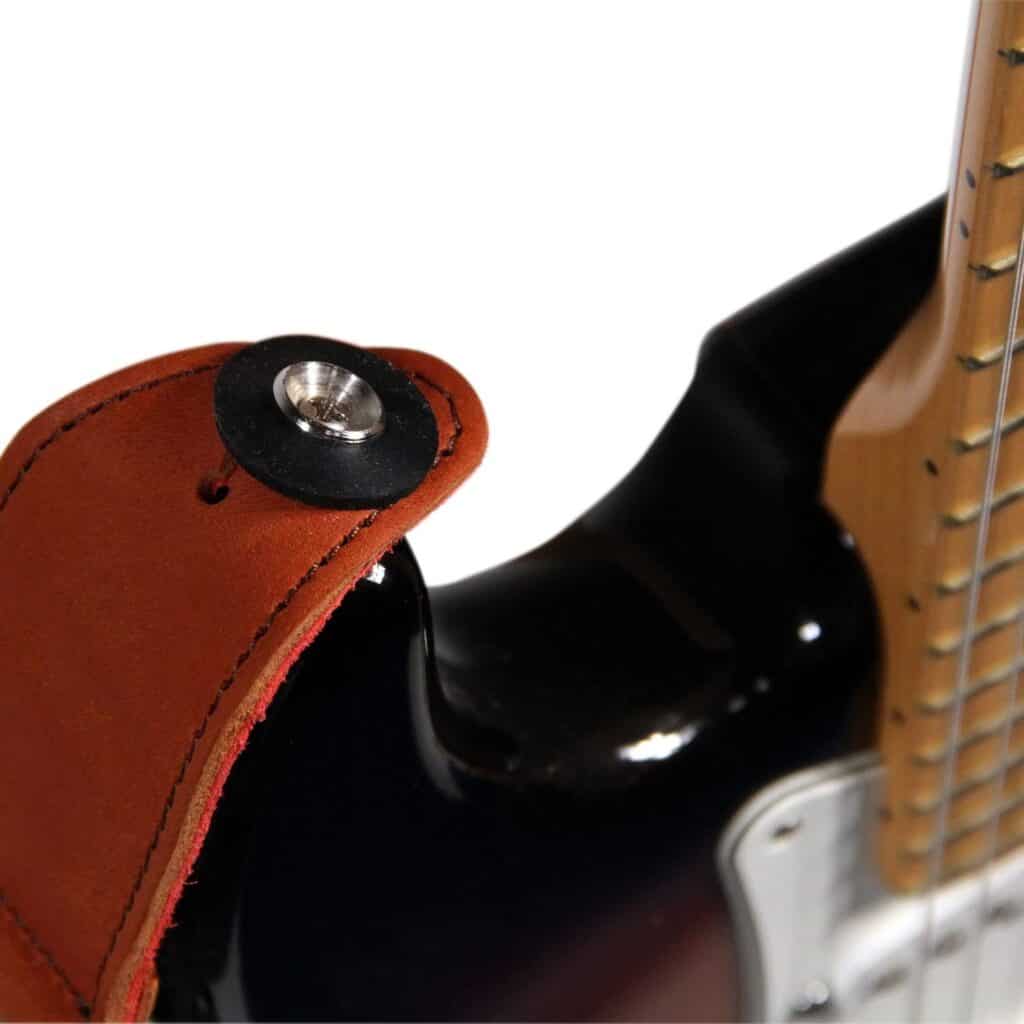
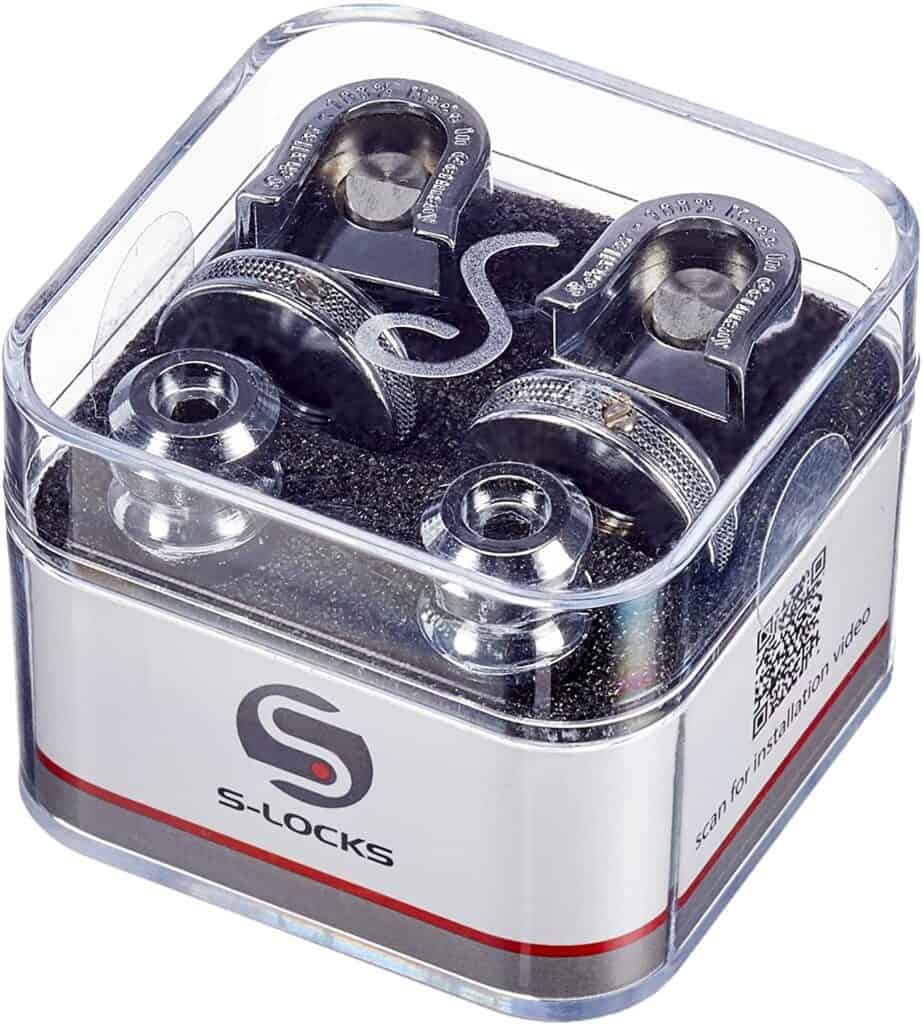
Strap Fitted Strap Locks
If you really want to secure your guitar to the strap, you will have to go for the strap-fitted locks. These strap locks replace the strap buttons on your guitar and lock the strap in place using a special lock. As you probably know, there are many different manufacturers that make them. These include D’Addario, Ernie Ball, Fender, Stagg, and more. But the ones that stand above all others are Schaller S Locks.
#9: Coil Split Your Humbuckers
Coil splitting is basically splitting a humbucker into two single-coil pickups. You’ll be using one of them and sending the other one to the ground. It’s a fairly simple process that I really want to write about in the near future. It’s a great way to get more sound from a guitar, while not changing its pickups. If you’ve never changed pickups before, this is a great introduction to guitar wiring.

Here’s a video that explains the process of coil splitting very well. Just don’t forget that if you want to coil split your guitar, you should find a kit that’s appropriate for your guitar.
#10: Scallop Your Fretboard
Even though scalloped fretboards are associated with metal leads and crazy overdriven bends, scalloped fretboards are used in many traditional instruments, and date back a lot earlier than the electric guitar.
A scalloped fretboard is a fretboard where the space between the frets is filed. It’s one of these guitar mods that has a lot of advantages and disadvantages. This is beneficial for playing lead, as it’s a lot easier to bend notes, but makes playing barre chords nearly impossible. Don’t do it, unless you played a scalloped fingerboard and loved it.
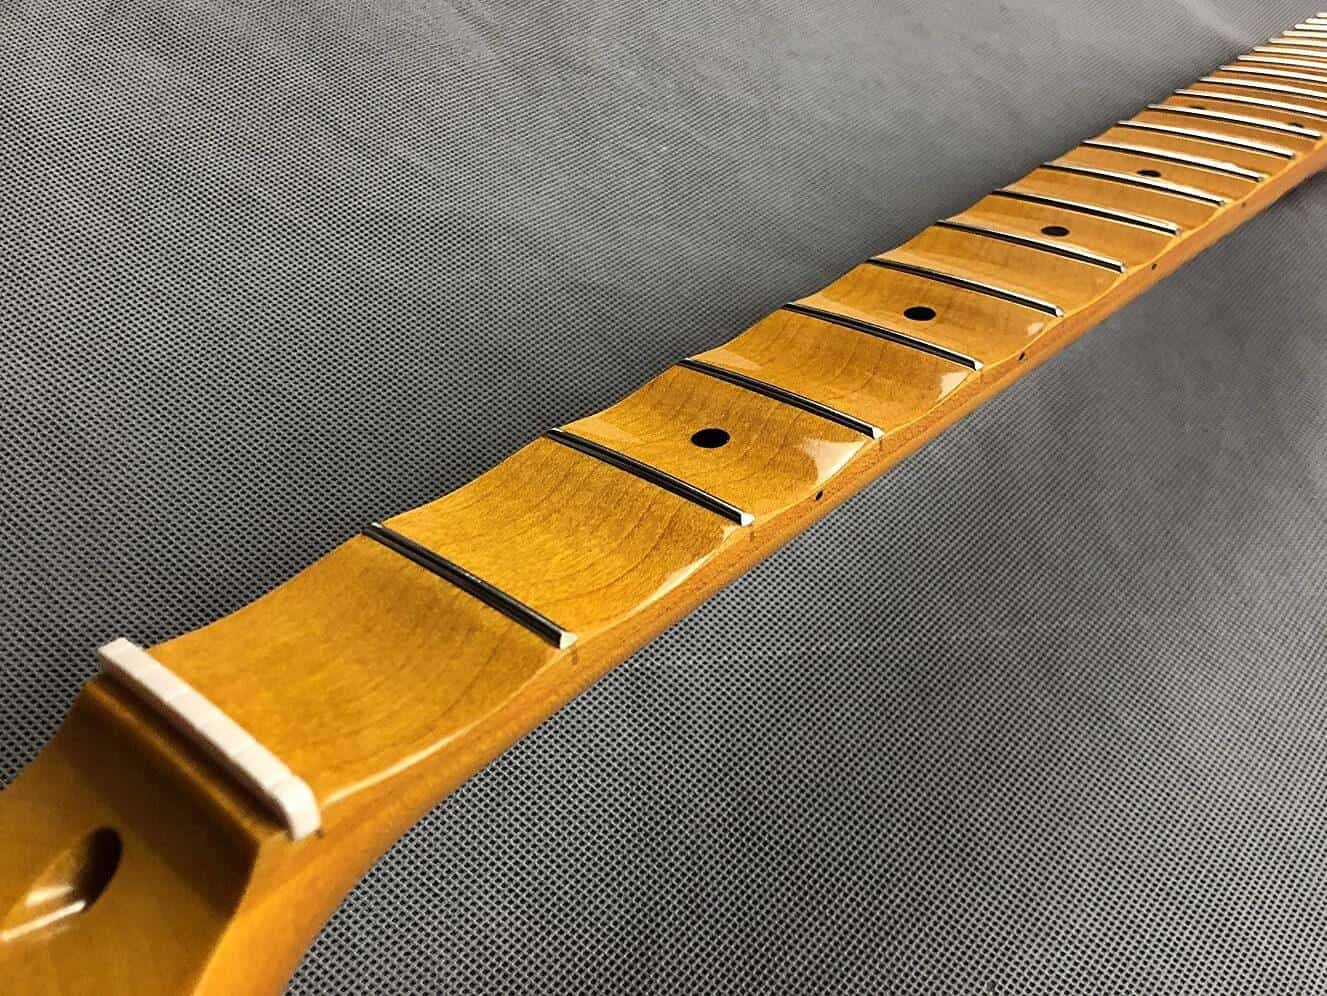
Scalloping your fretboard is not too complicated, but it requires some time and effort. You’re going to need a set of round files, sandpaper in a few different grits, and a lot of patience. If you’ve never done it, or are not experienced with woodworking, I’d advise you to buy a cheap guitar neck and try to scallop it first.
A Few Things to Remember When Scalloping a Fretboard
- Don’t carve too deep in the wood. There’s no need for that, and if can go through the position marker.
- You’re gone need to refinish the fretboard when you’re done. So make sure to have the appropriate finish available.
Finishing Thoughts
Today we went through 10 different guitar mods and upgrades you can easily perform by yourself. Even if you didn’t go for any specific modification idea, I hope that you got inspired and saw that it isn’t that difficult. Let me know in the comments if you have an idea I didn’t mention or anything else you want to say!
A great helpful do it yourself article. Thanks for posting it!