Setting up a guitar is easier than you think, and 95% of the time – you can do your own guitar setup. It is true that some more advanced things may require taking your guitar to a luthier. Things such as cracks or bent necks should be treated by professionals. But you can definitely save a lot of money by doing most of the maintenance by yourself. And other than the clear benefit of the huge money save, setting up your own guitar can even help you play better by understanding how it works.
In this guide, we’ll go step-by-step and set up the guitar from start to finish. The whole process takes less than an hour, and if you ask me – It’s a great way to spend a Sunday morning. There are some tools required, and I’ll provide links to the ones I’m using or had a good experience with. Some of them are important, and others are just supposed to make your life a bit easier. Either way, doing most of the ongoing maintenance by yourself will also save you anywhere between $50 and $100 every time you need to set up your guitar, so buying some tools is worth it. Additionally, keeping your guitar in a good shape makes sure that even if it will require a big treatment, it will be much less frequent.
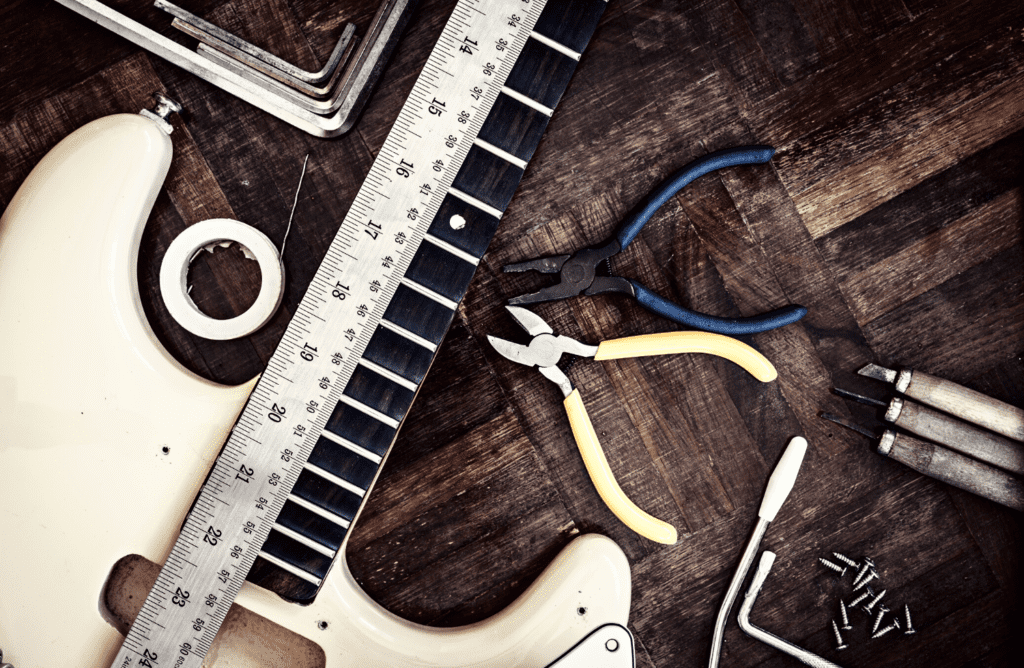
Table of Contents
What Is a Guitar Setup?
Guitar setup is the process of tweaking it to a player’s way of playing, and treating it so it will be as comfortable, and sound as good as it can. It usually includes adjusting the truss rod, setting the bridge height, applying finish and fretboard oil, Intonation, and tightening some nuts. It can also include securing some bolts and connections and filing the nut (both for adjusting its height and for better string slots). I promise you that it’s a lot simpler than it sounds.
When Should You Set Up Your Guitar?
There are a few rules of thumb that can generally tell you whether or not you need to set up your guitar. Some of them are related to something you want to accomplish. For example, If you want to raise your action to play with a slide, or if you want to change your string gauge. Others may be related to the state of the guitar itself. Some examples could be string buzz, dead notes, scratchy frets, weird intonation, audio jack noises, and more. Let’s go over them one by one:
When You Change Strings Gauge
It may sound weird at first but think about it for a second. If you apply the same picking force to pluck a 0.012 string or a 0.008 string, one of them is going to vibrate more than the other. It can cause both fret buzz and intonation problems. Adjusting the truss rod and the action will make your guitar play a lot better.
When You Change Your Tuning
The lower a string’s pitch, the looser it gets, and the higher the pitch the tighter it gets. Whenever you experiment with different tunings, or just try drop tuning for a while, you should adjust your guitar’s action.
When Some Notes Sound a Bit “Off”
Good intonation plays a big role in ear training and in sounding good in general. Bad intonation can be a big pain point if you are playing alone, but even bigger when playing with others. Unfortunately, perfect intonation is not something we can achieve with a guitar. But thankfully, we can still make it sound great.
When You Are Having Fret Buzz
Fret buzz in nature’s uncontrolled overdrive, and it sucks. It is also very easy to fix. Most of the time you’ll experience it on lower strings when playing on the lower frets. A good way to check if you have fret buzz is to do a spider walk exercise all over the neck and listen for buzzing notes.
When You are Having Dead Notes
Having dead notes is the best way to turn your daily practice routine into a horrible experience. Dead notes are a big problem for any guitar player and are usually happening because the truss rod is not adjusted properly, or if the action is too low.
When It’s Been a Few Months Since You Had Your Guitar Set Up
Being made out of wood, a guitar is very sensitive to weather changes and moisture. Once you do your first set up you’ll know what to look for and will see it changes with the weather.
When You Just Bought a New/Used Guitar
The first thing to do when you just bought a new guitar is to set it up for your liking. A guitar comes out of the factory usually with a decent setup, that matches a general player’s preferences. A lot of things can (and do) happen to guitars between they leave the factory until they get to the store. But even if they arrive in perfect shape, everyone has some sort of tweaks they can perform to make their guitar their own.
On a used guitar it is even more important. There’s no way to know for sure how and if your guitar was treated properly, or at all. If it wasn’t – it’s about time to show it some love. And if it was treated and adjusted, it was with another player in mind – and you are probably playing a bit differently.
When You Feel Like the Guitar is Holding You Back
A guitar should never hold a player back. It should feel natural and act as an extension of your body. If it feels weird, or not as good as it used to, try to find what exactly you want to change, and go over the steps below to get the adjustment you need.
Why Would You Want to Set Up the Guitar by Yourself?
There are a few good reasons to set up your guitar by yourself. I touched on some of them earlier, and here I’m going to elaborate on each a bit more:
- It can save a lot of money. Think about a set up every 6 months. That’s more than $100 a year you can easily save, per guitar.
- No one knows how you play and what you like on a guitar better than you. You can adjust everything to your liking and experiment with different string gauges and heights until you find your sweet spot.
- By setting up your own guitar you understand how it works better. By understanding how your guitar works, you get better at playing it. Simple.
The Tools Needed for a Guitar Setup
A proper guitar setup requires some tools. You probably already have some of them, such as the Allan keys you got with your guitar, a ruler, screwdrivers, wire cutters, tuner, capos, etc… Buying everything you’re missing from this list can cost a good amount of money. It will pay off in the long run, but be responsible with how much you spend. Remember this: the best tools are the ones you already have.
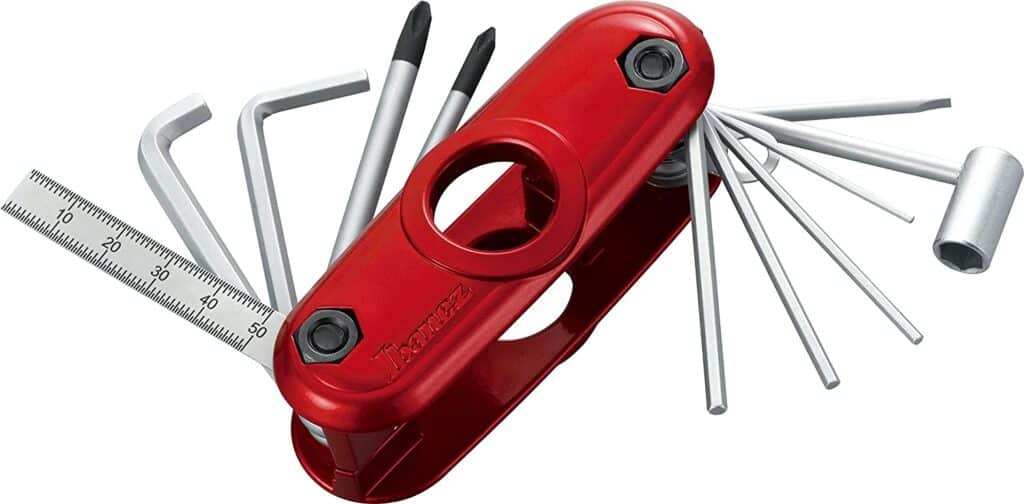
A nice little thing you can consider is this guitar multi-tool by Ibanez. It contains hex wrenches, screwdrivers, and a ruler.
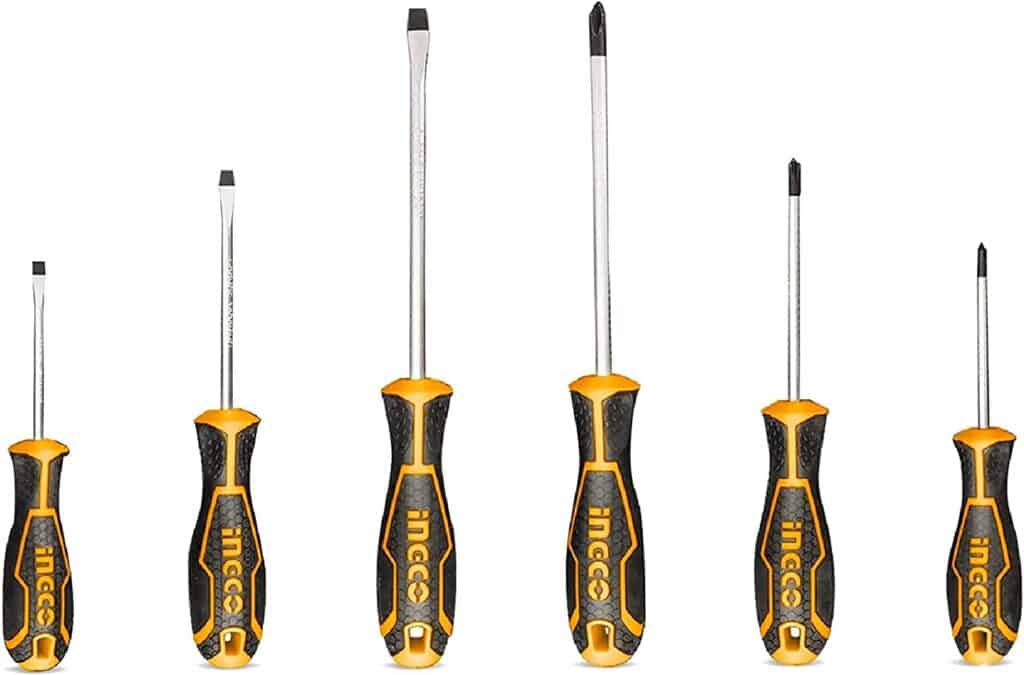
A Set of Screwdrivers
For removing the truss rod cover (you should definitely have some lying around the house, and even if you don’t – every tool store will have one). Some bridges (such as Tone-O-Matic) can be adjusted with a flat head. This is the one I’m using, it’s nothing fancy, but that’s all you really need.
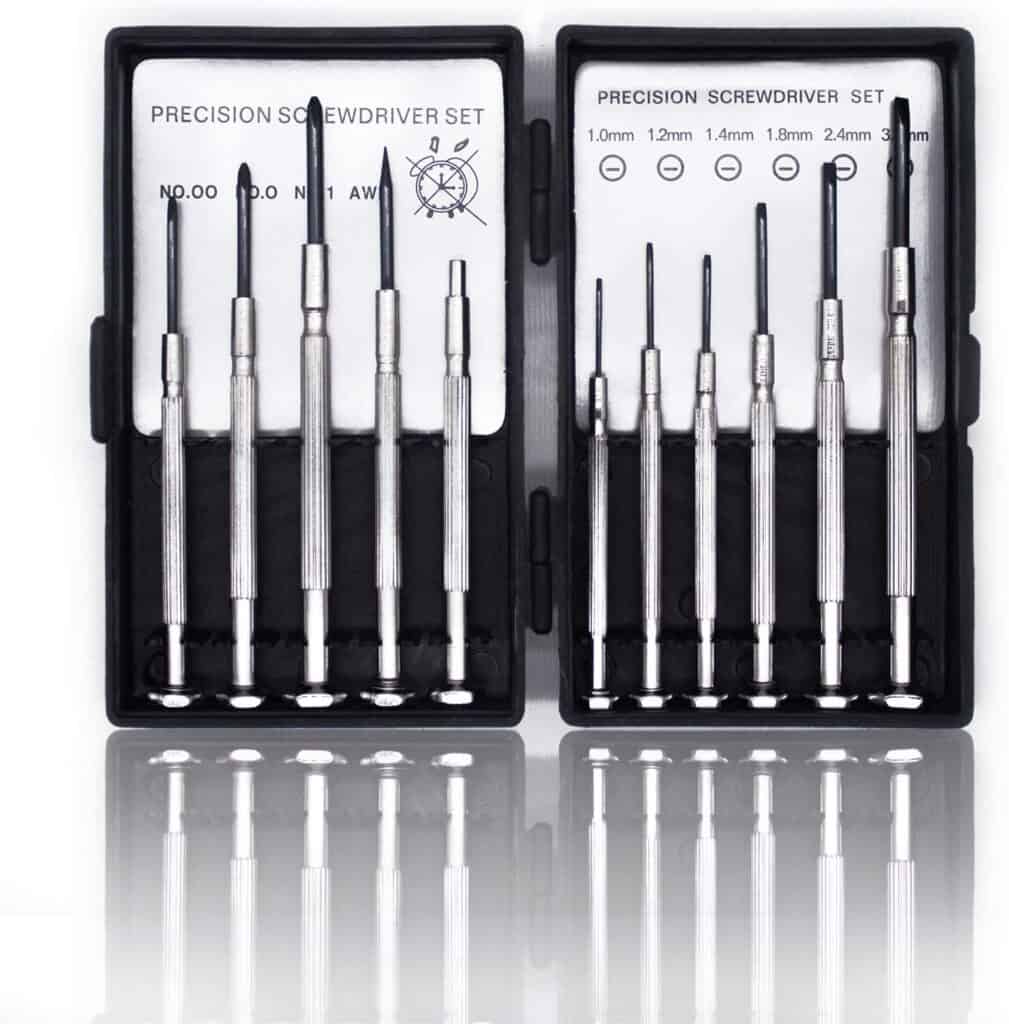
A Set of Precision Screwdrivers
For adjusting the pickup height and tightening the tuning pegs. You can get one from here, even though most screwdrivers will do the job. Especially the ones you already have at home.
A Set of Allen Keys
For adjusting the truss rod and adjusting the bridge height (on some bridges). You most likely got one with the guitar if you bought it new. If you didn’t, you probably have a few lying around somewhere, and you can also buy some from any hardware store or here.
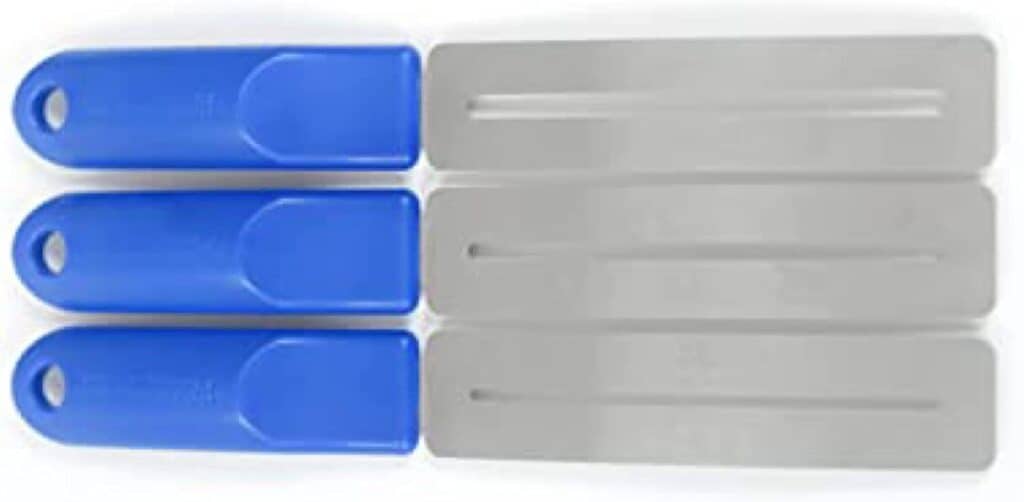
String Action Ruler
Ideally one with both imperial and metric system measurements. There’s not much point in getting an expensive one, this one will work just as well as ones sold for $30 and up. Any regular ruler will work too. In fact, in this tutorial, to show you that you don’t need fancy equipment – I’m going to use a regular ruler, just like the one we used in school. When you’re starting to get more serious about it, consider buying a proper string action ruler.
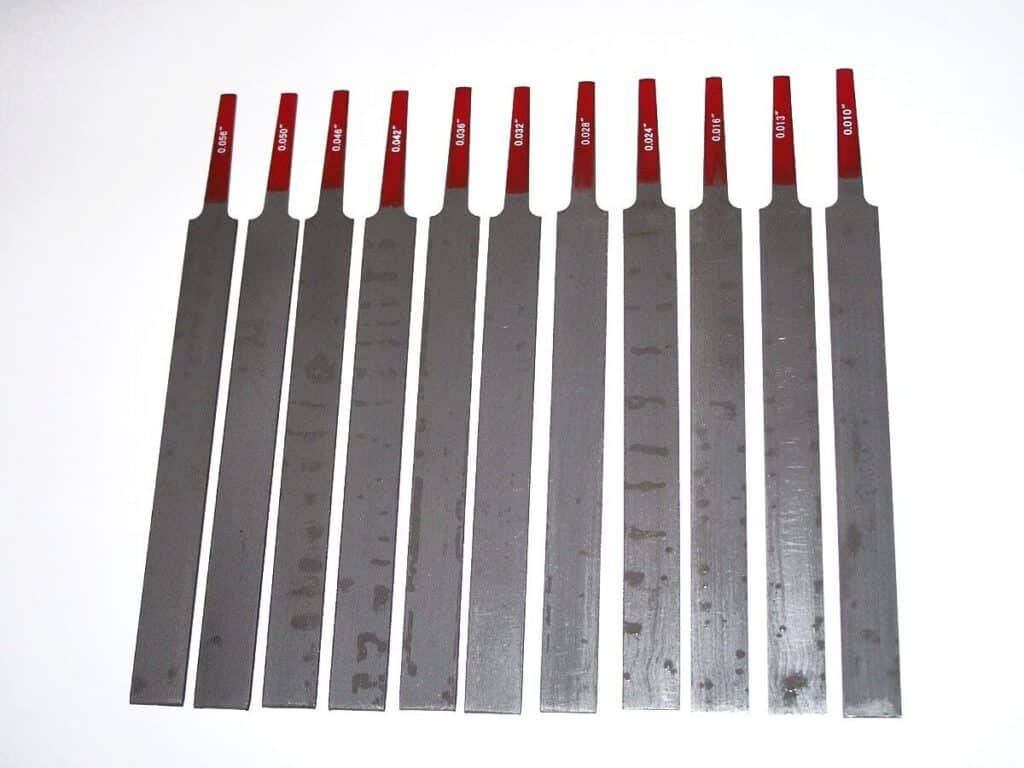
A Set of Nut Files
If you never set up a guitar before, you should get a set, especially if you have more than one guitar. That being said, I wouldn’t advise you to file the nut for the first time without having a spare nut lying around just in case. Here’s the set I’m using, it’s a bit expensive, but there are decent cheaper alternatives if the expense is too heavy. Just note that this is something you want to be high quality, and you want it to last for a long time. Take into consideration that you might not need to file the nut slots at all. Usually, this is something you should do only once to twice in your guitar nut’s entire life span.
Fret Collars
To protect the fretboard when brushing the frets, this is the set I used to have before I lost it. These days I’m using painter’s tape instead. Some experienced guitar techs don’t use anything, because their hand is steady enough to avoid scratching the fretboard, and they oil the fretboard afterward anyway.
2 Capos
When doing a guitar setup, the cheapest capos you can find will work just as well as expensive ones. If you don’t have any capo or have only one, you can buy them here
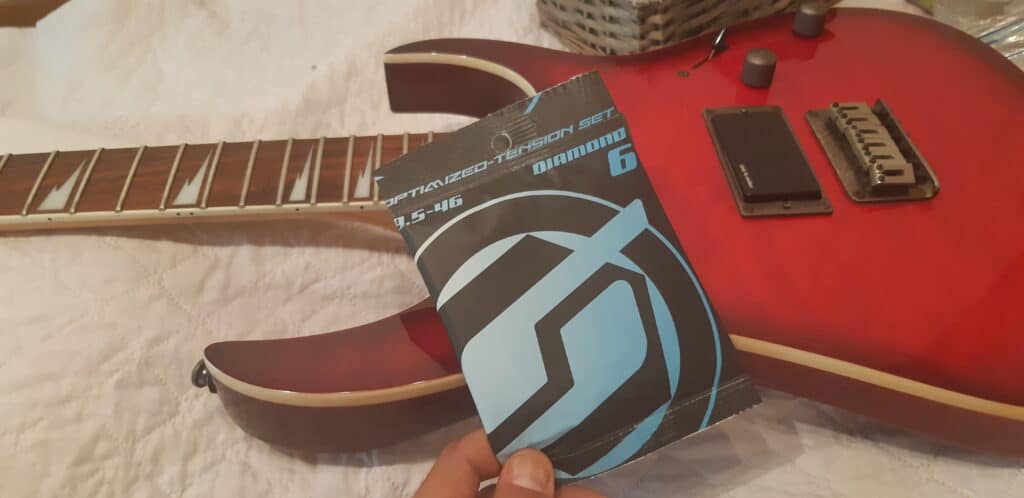
A Fresh Set of Strings
There are many different types of strings to choose from, go with the one you like.
Frets Polish
Not necessary, but it is recommended to shine the frets up every once in a while. It will help the strings glide better when you bend them. You can use any fret polish, this is the one I currently use.
Fretboard Oil
If you are not sure which fretboard you have, or what each fretboard finish is sensitive to, use this oil. It’s safe to be used on any type of fretboard – Except for maple. I’m using lemon oil, but some people don’t like it. If you have anything against lemon oil, you can try this one.
Don’t use any type of fretboard oil on maple fretboards! To clean a maple fretboard, follow these instructions.
Spray Contact Cleaner
To maintain your guitar’s “under the hood”. It will help you eliminate the craving sound when twisting knobs. If you don’t have one, here’s a good option.
Dielectric Grease
If your knobs are stiff, this is what we use to soften them. This is the one I’m using.
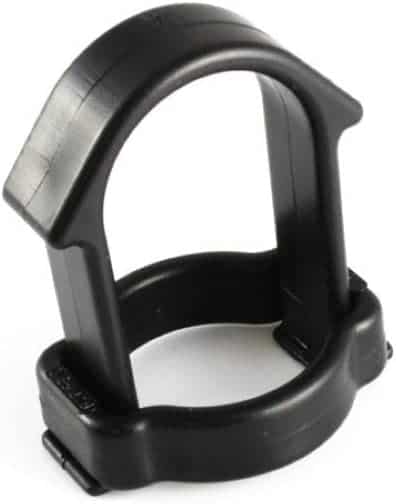
Guitar Knob Puller
As weird as it may sound, this is actually important. This little plastic knob puller protects your guitar body or pickguard from scratches when you try to pull out a knob. There are some other designs in the market, but to me, this one is unmatched.
A Good Tuner
In this guide, I’m using an old handheld tuner by Maestro I have since the 90s, but most guitar techs like to use strobe tuners when intonating guitars because they are a lot more accurate. But honestly, any decent tuner will do the job too. If you have doubts, read this guide for choosing a guitar tuner.
How to Set Up a Guitar
We finally got to the interesting part. If this is your first time setting up your guitar, read everything from start to finish, and then read it again while you’re following the guide. This way you’ll know what to expect and why the steps are in that order, and if you have all the tools that you need.
1. Adjust the Truss Rod
Adjusting the truss rod is the first, and one of the easiest steps of setting up your guitar. Basically, there are 3 different states a guitar neck can be in:
- Back bow: An extremely undesired state for a guitar neck. In this case, the neck is bent backward. Making the strings closer to the frets towards the middle of the neck. It causes dead notes and a lot of fret buzz.
- Straight: Some players will aim for that. But to me, it’s another undesired condition. Having the strings parallel to the neck will introduce a lot of fret buzz and will require a fairly high action and soft playing to prevent it from happening.
- Upbow: A slight upbow is considered (at least by me) the best state a guitar neck can be in. It allows the string to move freely when strummed or picked, anywhere on the neck.
Inspect the Neck Curve
Using a capo on the first fret, tap on the strings in the higher register. This is called the “tap test”. You want to hear a little metal click. If you hear nothing, it means that the strings are sitting flat on the frets, preventing them from vibrating. If you feel like the string needs to go a long way before hitting the fret, you probably have too much of an up-bow.
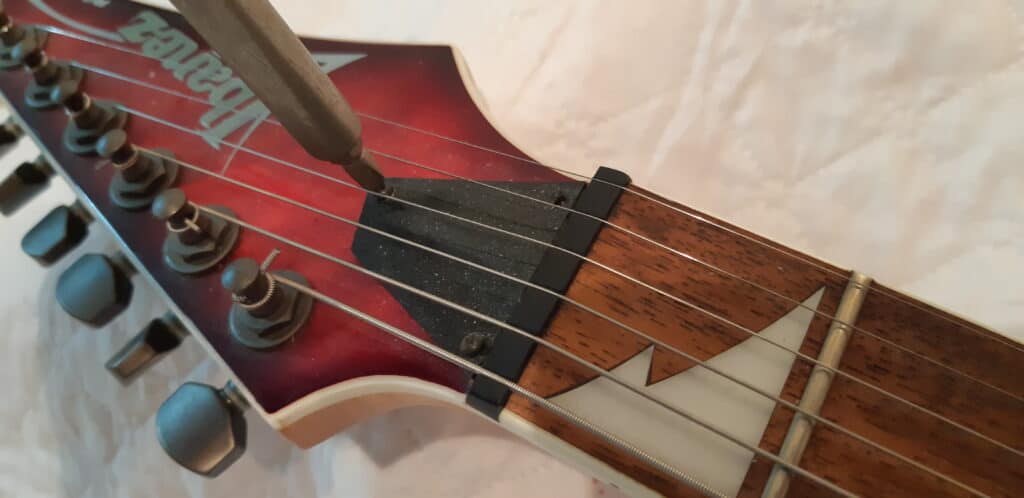
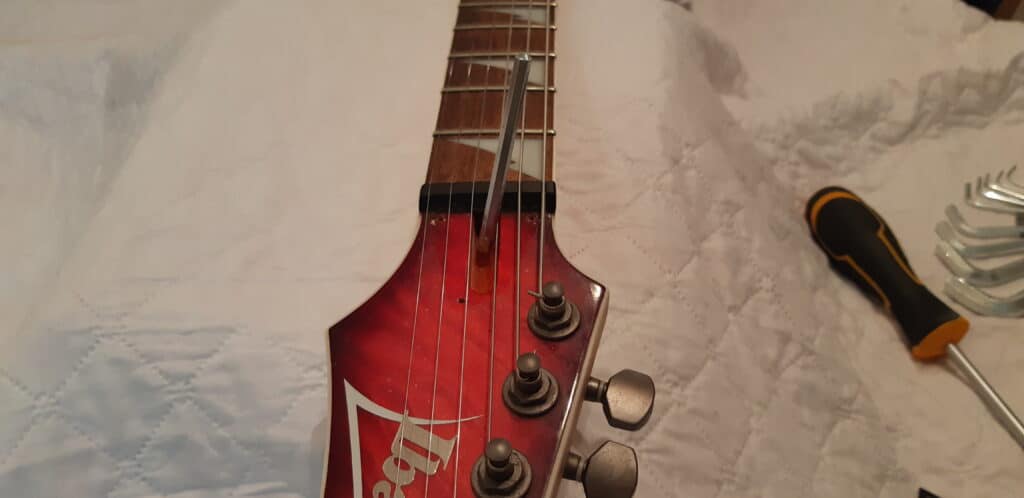
Remove the Truss Rod Cover
Take a small Philips screwdriver and remove the truss rod cover. If you can’t locate it on the headstock, it can be accessed by removing the neck of the guitar. If it’s the case with your guitar, I’d advise you to let a professional adjust your truss rod. After you’ve seen it being done, you can give it a shot if you’re confident. Just note that it is a lot harder and requires some experience because you need to adjust it without the pressure from the strings.
Make the Actual Truss Rod Adjustment
To create an up-bow, we need to loosen the truss rod, while to create a back bow we need to tighten it. Make small adjustments (1/8 – 1/4 turns every time) and remember the number of turns you did, so you can revert to the original state if needed. If the truss rod is not rotating easily, take it to a luthier for inspection. Either way – don’t use force to adjust the truss rod.
2. Adjust the Guitar Action
If you’re planning to change the string gauge, skip this step until after you’ve changed your strings. Let’s start by saying that every player likes their action a little differently, and it’s fine. I like my action relatively low, but there are great reasons to like it higher too. Do whatever you find comfortable. Just note that the higher your action will be – the harder it will be to properly intonate your guitar. That’s because when you press on the strings, you will have to stretch them even further to get to the frets.
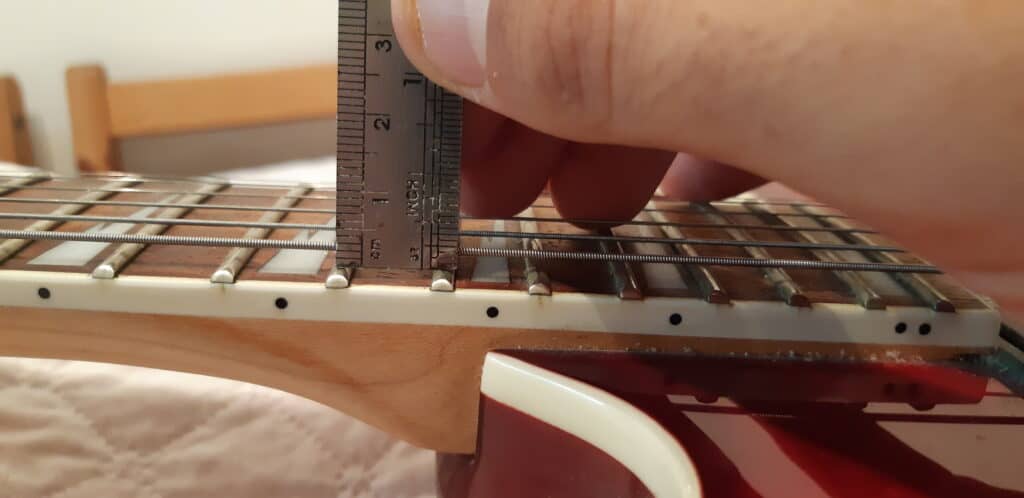
Measurements
Use a ruler to measure the action of the guitar. The action is the distance between the top of the fret to the bottom of the string. Don’t be tempted to buy a super expensive ruler here, they are all the same (buying a ruler will just save you a few minutes and is not required at all).
There are 2 spots where you can measure the action of your guitar:
- on the 12th fret
- on the 17th fret, while cappoing (is that a word?) the 1st fret. This way, you eliminate the nut height.
Both methods will most likely give the same result, but personally, I prefer the 17th fret method over the 12th.
In the end, your feel trumps the measurement. If it doesn’t feel comfortable, it doesn’t really matter if you hit the exact number you aimed for.
Electric Guitar
I’m playing soft and using thin strings, so I like my low E at around 1.6mm (1/16th of an inch) and my high E at 1.1mm (a little less than 3/64th of an inch), so this is what I’m going for initially. I’ll make adjustments after playing and seeing how it feels and if some frets are buzzing. You should always adjust by feel and not try to reach a certain number.
Acoustic Guitar
On an acoustic guitar, the action is usually higher. I’m usually aiming to hit around 2mm (5/64″) on the high E and 2.7mm (7/64″) on the low E. Note that your preferences might be different than mine.
Adjusting the Action on the Guitar
First, let’s take a look at the low E string. Use the ruler and see its height (for reference).
How to Adjust the Action on an Electric Guitar
To adjust the bridge height, you need to take a small Allen wrench, or a flat-head screwdriver (depending on your bridge) and turn the saddle screw to the right to lower the saddle or left to raise it. Make half turns every time, and make sure it’s comfortable and none of the frets are buzzing. Remember how many turns you’ve done so you can always revert to how it was if needed.
How to Adjust the Action on an Acoustic Guitar
On an acoustic guitar, you need to loosen your strings first (but don’t remove them). Take the bridge saddle out and start sanding the bottom part of it. Any sandpaper will do, just make sure to finish it with a thin one. Do it in small increments, because you really don’t want to over-sand it. I’m fairly confident in sanding my saddle, but I have spare saddles I kept from when I upgraded my acoustic guitars. After you’re done sanding, put the saddle back and tune the guitar again. Repeat until you are happy. Here, a string winder can make your life a lot easier.
Back and Forth With the Truss Rod
After adjusting the height of the saddles, you want to make sure that the curve of the truss rod is still comfortable. You may need to loosen it a bit more if you lowered the bridge height, or tighten it if you raised them. You may need to adjust the truss rod again in a few hours, but until then, close it.
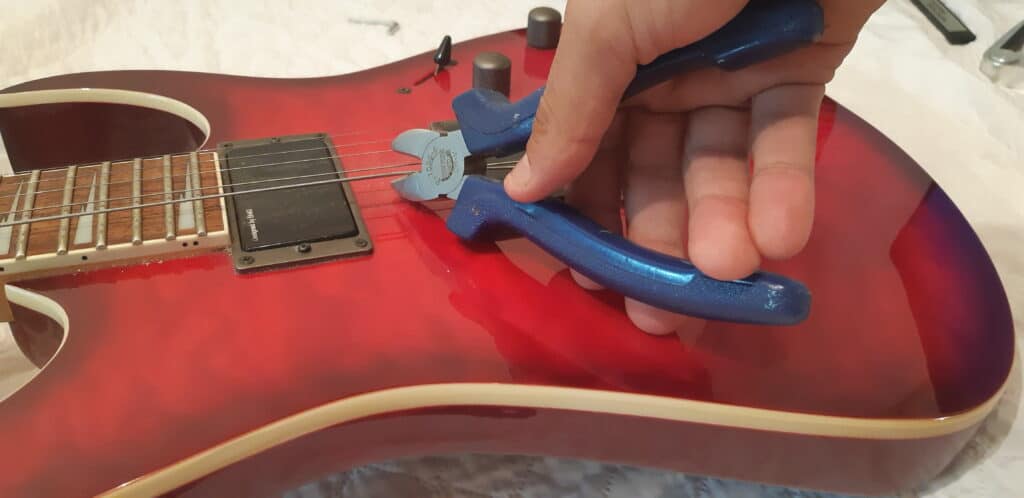
3. Remove the Strings
After we used them as a straight line when inspecting the curve of the neck and adjusting the saddles, it’s time to say goodbye to your rusty old friends. If you plan on filing your nut slot, consider loosening instead of removing them.
4. File the nut slots
I want to start by saying that if this is the first time you set up your guitar – skip it. There’s almost no way back from getting it wrong here. And even though buying a new nut is a fairly cheap investment, and can even be considered a guitar upgrade, you don’t really want to be forced to do it. Additionally, you most likely don’t even need to file the nut slots, as it should be done only once to twice in your entire guitar life span. If you have a locking nut (like in Floyd Rose, Ibanez’s Edge, or Edge Zero), you can ignore this step altogether. BUT, if you feel like your strings are slipping or if you hear the notes “bouncing” when you bend, you might not have a choice.
Filing the nut slots is a delicate process. Take your time and try not to rush it. Take your nut files and gently run them through the slots. Use the proper file to match the string gauge for each of the slots.
Bear in mind that filing the nut slot may also lower your action, so be gentle.
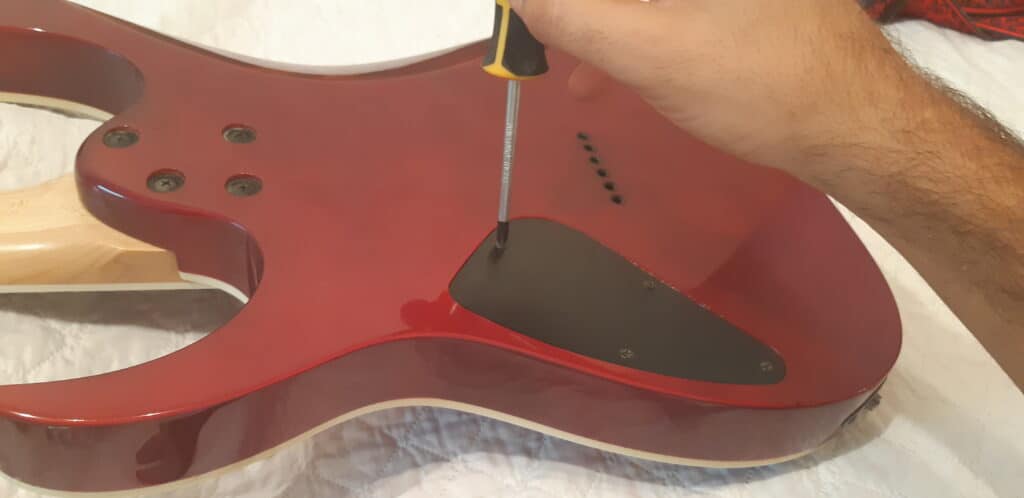
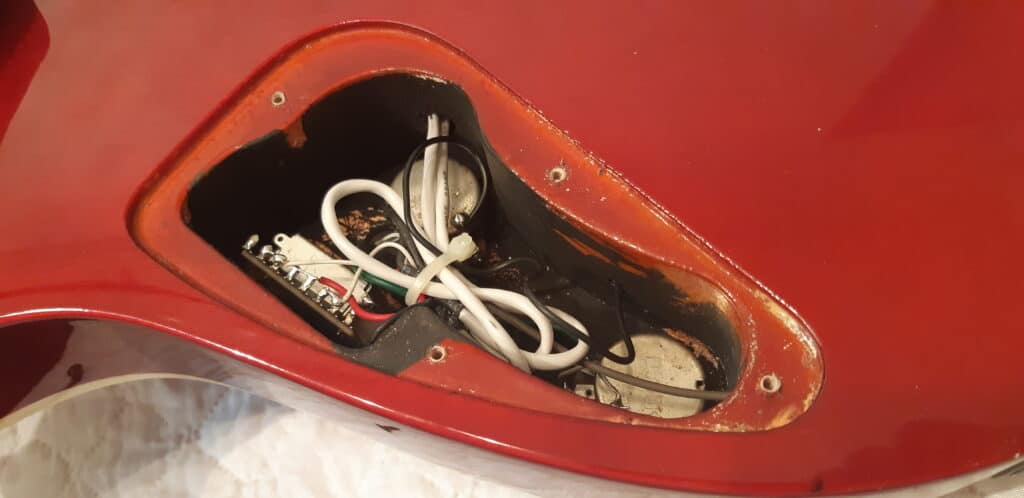
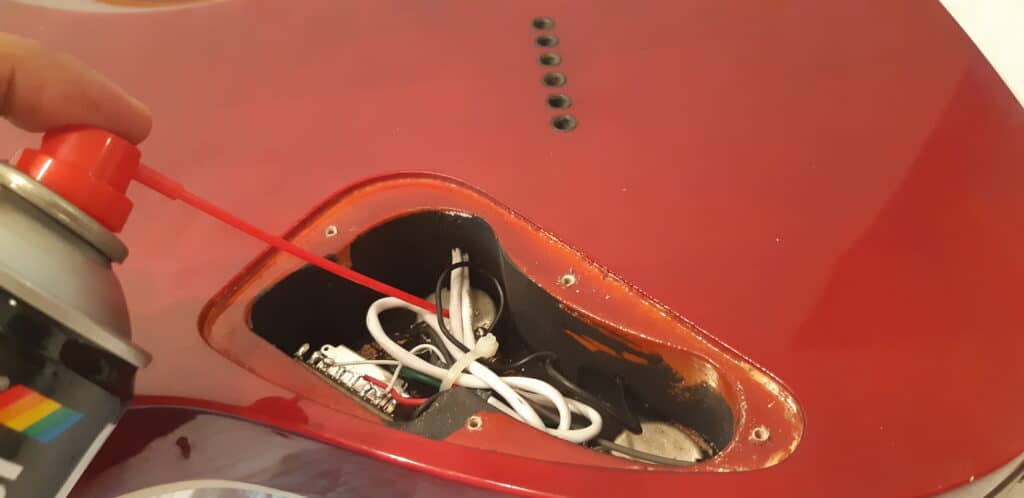
5. Clean the Electronics
This simple step will help you make sure that all the connections are clean. Clean connections last longer and are a lot quieter. Remove the back cover of your guitar or the pickguard, so you can see all the electronics. Connect your guitar to an amp and gently touch the connections. Turn the knobs, and switch pickups. Search for noisy connections. Now, take your circuit spray cleaner and lightly spray the faulty connections. I go about it a bit further in a dedicated post about how to fix noisy guitar knobs. Close the cover when you’re done.

Opening the back cover of the guitar to access its electronics The electronics of an electric guitar Using circuit cleaner to eliminate noise from the electronics of the guitar during a guitar setup
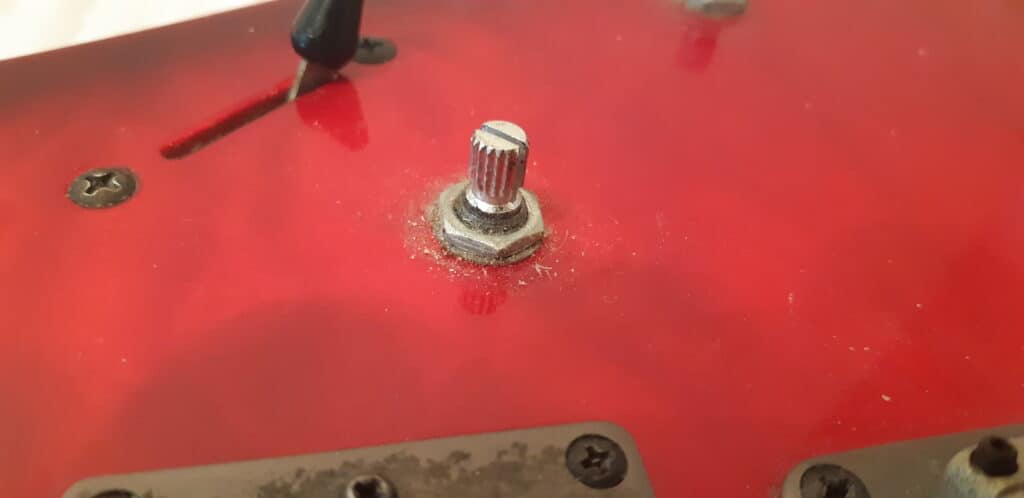
6. Clean and Oil the Knobs and Controls
Stiff buttons are a great way to get annoyed really fast. Luckily, it’s just as easy to fix it as it is to find a reason to skip practicing scales. Take a knob puller and take the faulty knobs off. Rub some Dielectric grease using a cotton bud, you can push the grease inside using a piece of paper. Start twisting the knob to let the grease inside and voilà, as smooth as new. Some people like to use multi-purpose spays, and even things such as WD-40, but I wouldn’t advise you to spray any chemical you’re not familiar with anywhere near your guitar body.
Dirty guitar control pots are the cause of noisy and stiff guitar knobs Cleaning the control pots is part of a guitar setup
7. Tighten Screws and Bolts
Screws and bolts are keeping your precious guitar intact. You should always take a look at these as part of your maintenance routine. A good idea might be to keep a set of screwdrivers and Allen wrenches in your guitar case.
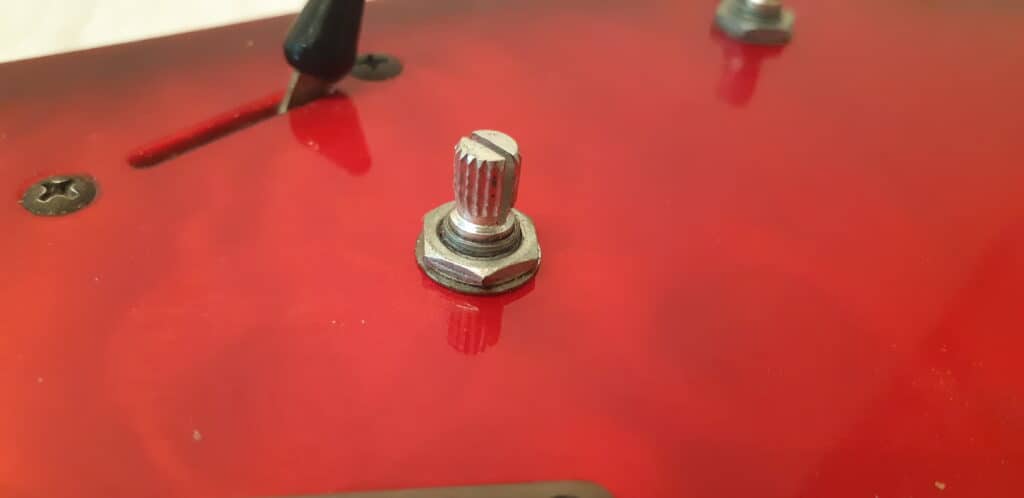
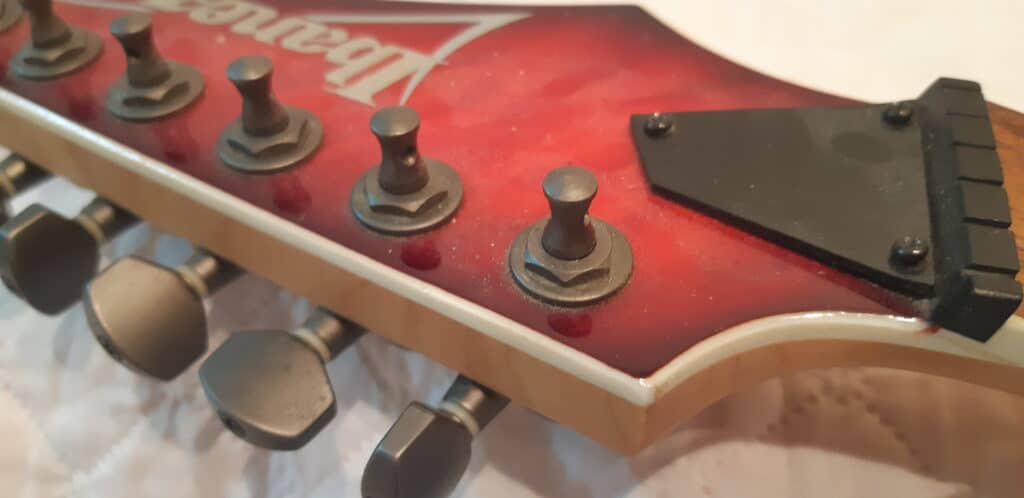
Tuning Pegs
Your tunning pegs will probably feel very stable when they’re under the pressure from the strings. So in order to inspect them properly, you should start by removing the strings from the guitar. After you’ve done it, go over them one by one and see if they’re moving or shaking. If they are, simply tighten the screws until it stops moving. Be careful not to overdo it, you don’t want to wear the screw holes.
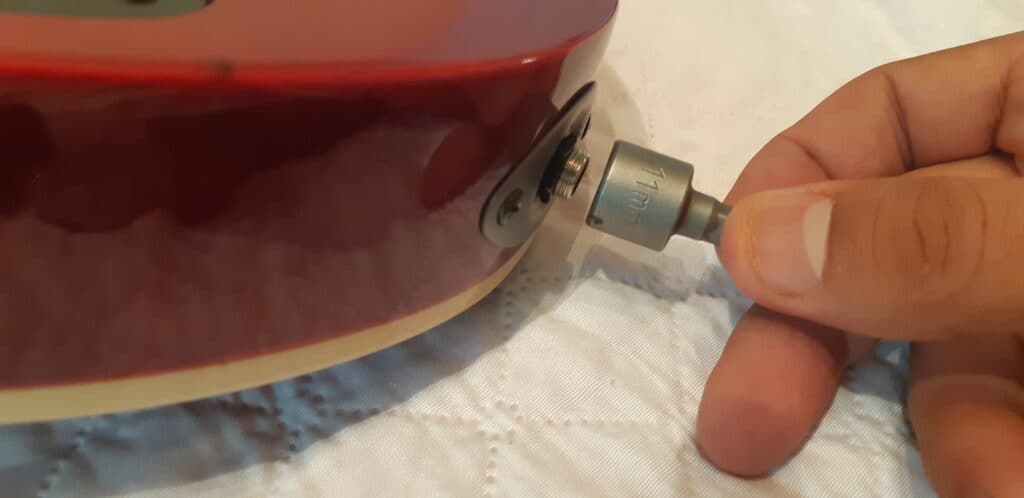
Output jack
Tightening the output jack will reduce unwanted cracking sounds, and will help prevent the soldering from disconnecting. I’m using an 11mm nut driver, but your guitar might need a different one (12mm is also very common).
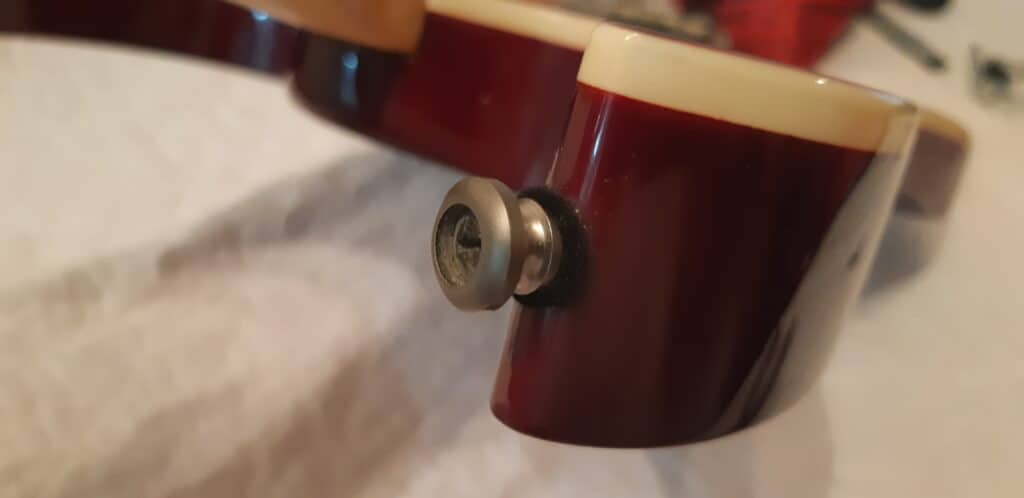
Strap Buttons
This goes without saying. The strap buttons support all the weight of the guitar. You are relying on these screws to keep your guitar as far away from the floor as possible. Just don’t overtighten them.
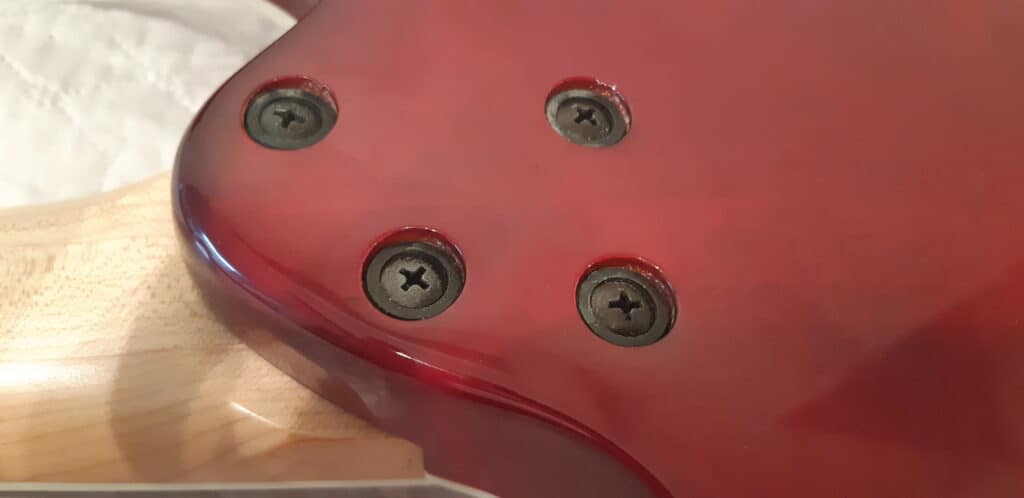
Neck (on bolt-on neck guitars)
A wiggly neck is always a problem. You want these bolts to be firmly closed, but again, don’t overdo it.
String Trees
String trees can be under a lot of pressure from the strings. Take the opportunity of tightening them while the strings are off.
8. Frets Cleanup and Polishing
Go over all the frets with soft wet steel wool or super thin sandpaper. Apply polish if you like, but just getting rid of all the dust and dirt you have there will make your frets a lot smoother. It will have a huge impact on your bends. Using a Fret Collar is safer if this is one of your first times; otherwise, you can use paper tape. Just be careful not to scratch the fretboard.
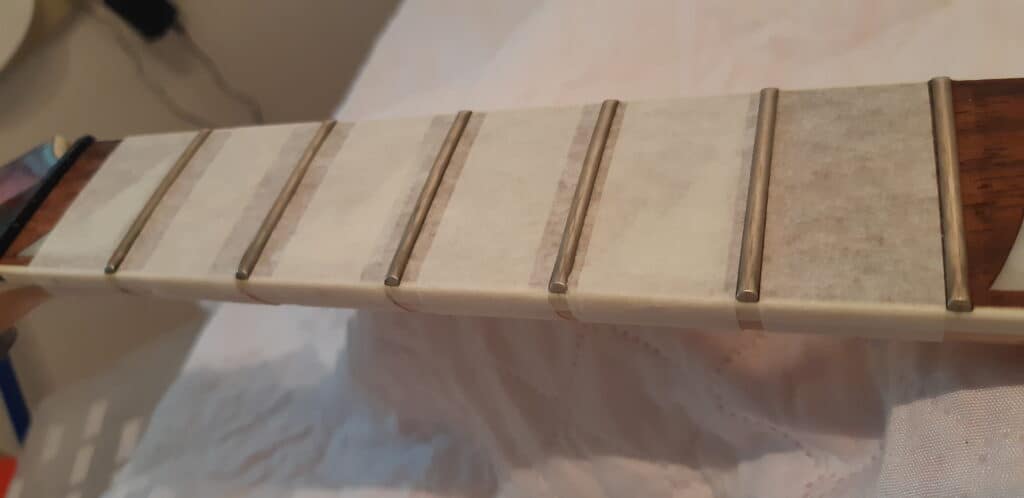
Dirty guitar frets Clean guitar frets
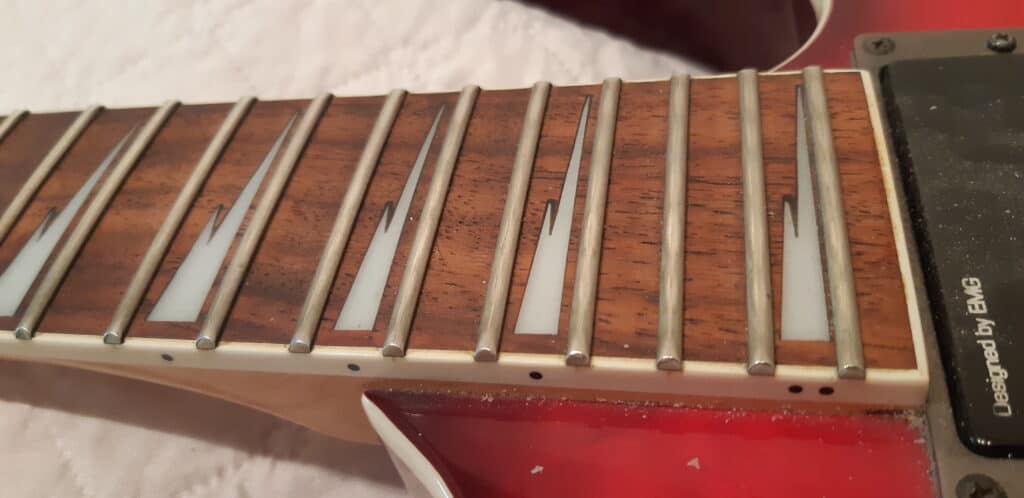
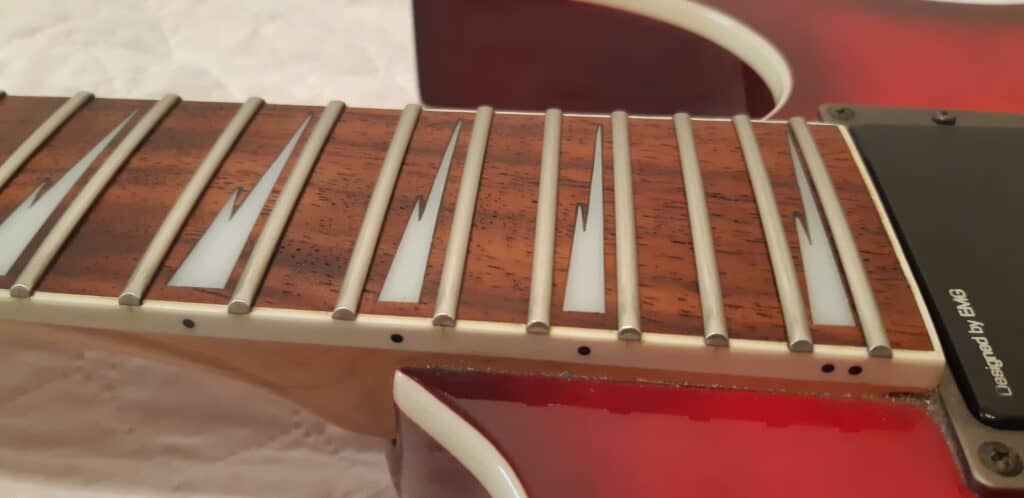
9. Clean and Oil the Fingerboard
If you have a maple fretboard – see: how to clean a maple fretboard.
Since the strings are now off, this is a great opportunity to clean and polish the fretboard. Most fingerboard oils will do, even though what I like to use is Lemon Oil. Just put some on a clean towel (or microfiber cloth if you feel fancy) and apply it to the fretboard. As weird as it may sound, this is extremely satisfying to do. And the impact it has on the looks of the guitar is huge. If you haven’t done it in a long time (or ever), let it sit for a few hours and repeat it if needed. The oil will moisturize the wood and will help prevent cracks.
10. Change the Strings and Tune your Guitar
Put on a fresh set of strings. If you plan on changing the gauge you had there before, make adjustments to the action and truss rod. Lower gauge strings require higher action and vice versa, and they put less pressure on the neck, so you should loosen the truss rod a bit. If your guitar has a Tune-O-Matic bridge, check out this post for a little trick that can help you break fewer strings. Now, tune your guitar. And if your guitar has a Floyd Rose bridge (or Ibanez’s Edge or Edge Zero), Check out this post for a restringing guide and this post for a little trick that will help you save a lot of time with retuning.
11. Adjust the Pickups Height
More often than not, pickups are set too high by manufacturers. They have their reasons, but that’s not the point of this article. It increases the volume at the cost of harming the tone, and that’s what we’re about to fix.
By lowering your pickups you can expect a fuller sound and more sustain. The reason for it is that just as much as the vibration of the strings affects the magnets in the pickups, the magnets affect the strings’ vibration. Basically, pulling them towards the resting point in the middle. By increasing the distance between them, you’re allowing the string to move more freely.
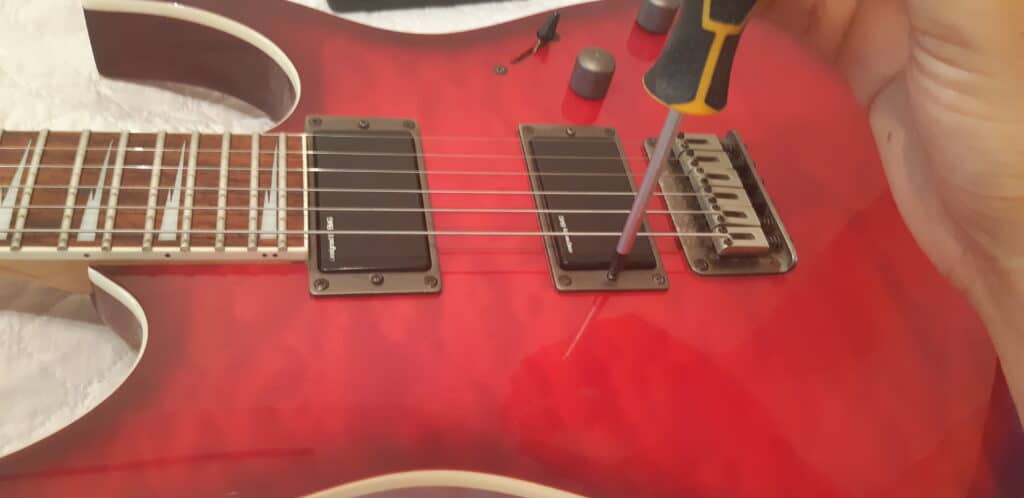
How to Adjust Pickup Height
On each side of your pickups, you’ll see a small screw that allows you to change the pickup height. Screwing them will lower the pickups while unscrewing will raise them. As usual, start with a quarter turn on each side and remember how many turns you did. Remember to raise the volume in your amp to compensate for the reduction in volume when you check the tone. Keep adjusting the screws until you start losing low-mids and low-end information, and then dial them back up a bit.
A general rule of thumb is to set the pickup height to around 3mm (1/8th of an inch) below the low E string when pressed on the highest fret. But just like when setting the action, for with what sounds good for you.
12. Fix the Guitar’s Intonation
Soley intonating your guitar properly will make it sound a lot better. Many people think it’s a lot more complicated than it actually is. In fact, it’s a pretty simple thing to do.
Retune your Guitar
Start by tuning your guitar again, make sure you’re tuning is spot on, because every slight deviation can be amplified after adjusting the saddles. For this part, guitar techs usually use a strobe tuner, but any good tuner or most decent digital tuners will do the job.
Check the Intonation
Checking the pitch of the low E string while intonating the guitar Checking the pitch of the 12th fret harmonic to fix the guitar intonation
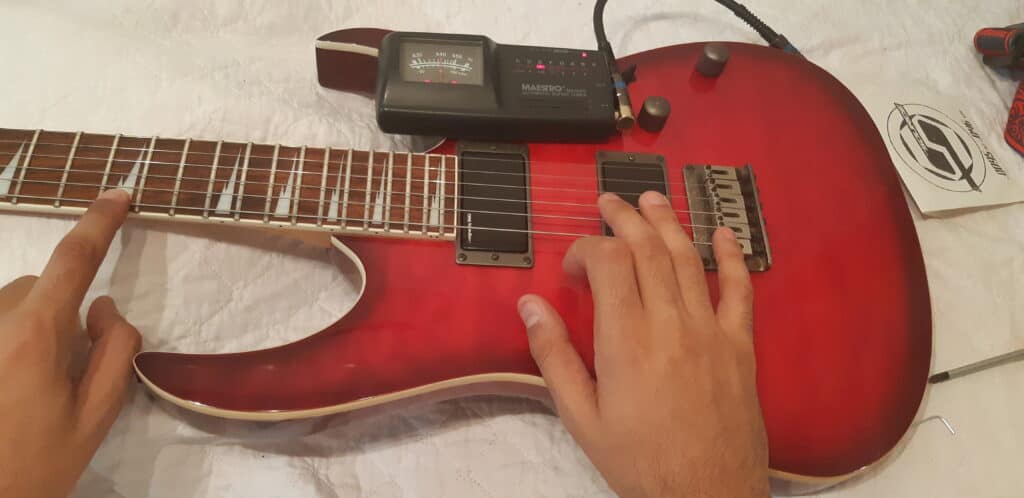
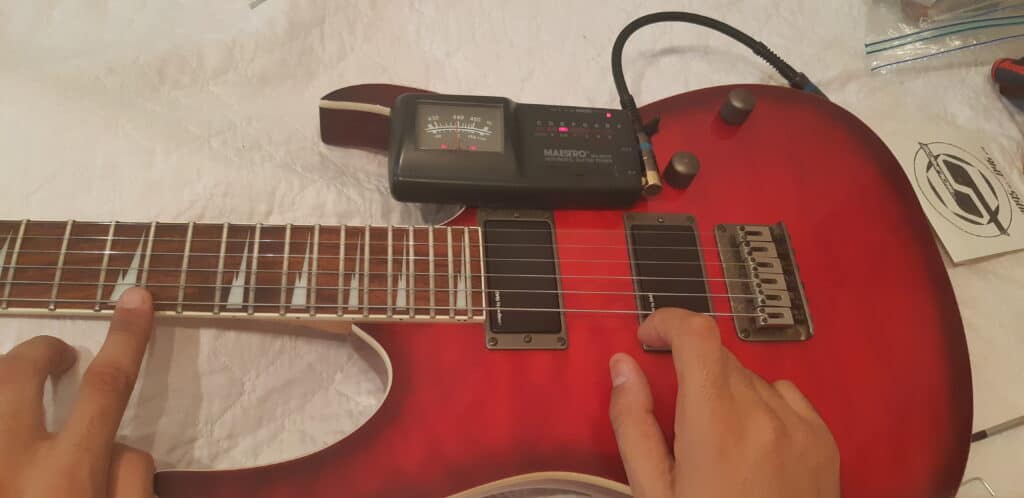
The idea behind what we’re about to do is that the vibration frequency of a string is doubled every time its length is halved while keeping the same tension. Doubling the vibration frequency makes it play a note exactly an octave above the original note. We’re going to compare the note we get after pressing the 12th string, with the natural harmonic we get by “cutting” the string length in half. If the harmonic matches the fretted note, it means that the length of the string is perfect. Unfortunately, after adjusting the truss rod, the bridge height, and replacing the strings – it’s very unlikely. So in order to determine whether the string is too short or too long, we’ll compare the pitch from pressing the 12th fret to the pitch from the 12th fret harmonic.
The rule is simple: if the harmonic is higher in pitch than the note you get by pressing on the fret, your string is too long. And if the harmonic is lower in pitch than the fretted note, the string is too short.
How to Set the Intonation on a Guitar
Intonating the guitar is basically adjusting the length of each string by properly positioning the saddles.
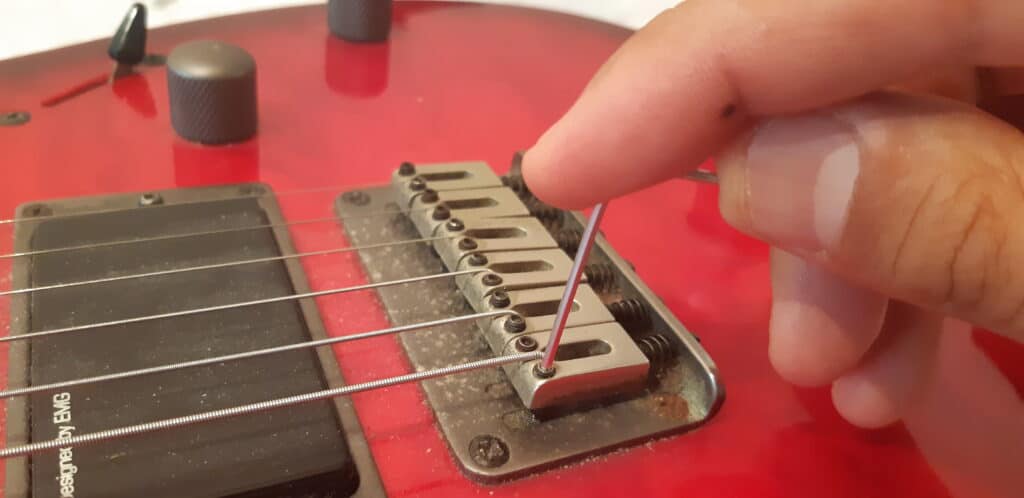
Adjusting the Saddles on Most Bridges
To adjust the saddles, use a hex key, or a proper screwdriver (depending on which bridge your guitar has) and adjust the back screw. On some bridges, such as the Tune-O-Matic for example, the screws can be found on the front side of the bridge (facing the headstock). Keep adjusting it until the two pitches are exactly the same. Take note of the original position of each saddle before you start, so you can revert back to it if needed.
Adjusting the Saddles on Floyd Rose, Edge, or Edge Zero bridges
If you have a Floyd Rose or a similar bridge, you are probably used to the fact that everything is more complicated, and intonating is no different.
Start by loosening the strings (don’t forget to release the nut clamps). Loosen the fallen screws while using a flat head screwdriver to hold the saddle in its position. Move the saddle using both the flat head screwdriver and your hand from the other side. You don’t need to move it a lot, make a small adjustment and tighten the Allen screw back. Check the intonation again and make adjustments if needed.
13. Finish and Clean Up the Body
Clean up, go over your guitar with a clean towel. You can take a compressed air can and spray it behind the bridge. Just make your guitar look as it looked the day you bought it. You can apply some polish to the body, to protect and preserve it. Just again, don’t treat anything made out of maple.
Conclusions and Finishing Thoughts
Performing your first full guitar setup is an achievement you should be proud of, but this is only the first step. Making this a habit requires some commitment, but it gets easier the more you do it. Not all the steps are required every time. And with the experience you get, you’ll know faster what needs to be done each time you set up your guitar. I really hope you enjoyed this post and found it useful. As usual, if you have suggestions, questions, or any other thing you want to say – I’d love to hear your thoughts in the comments!
I need to spend some time learning much more or understanding more.
Thanks for this post. These are really helpful tips!
Thanks for not trying to sell unnecessary things like other similar guides.