All you guitarists out there, especially beginners, if you want to add a full-sounding finger-picking style to your repertoire, then this is the guide for you. Fingerpicking acoustic guitar isn’t difficult, and if you really want to learn then you probably can, as long as you practice.
If what you already play or desire to learn is classical guitar then this type of picking is likely not for you. What I’m writing about is the popular music picking style heard on such classics as “The Boxer” by Paul Simon or “Blackbird” by The Beatles. You may not be able to start off playing these pieces, but keep at it, and watch other players. You’ll be amazed at how great you can sound once you get the patterns down. The only other requirement before this type of playing makes sense is that you can play basic chords in first position, like D, C, G, A, E, etc.

Table of Contents
Getting started
So let’s get going. Start off with the thumb of your strumming hand, which for most people is the right hand. The thumb is going to play the bass notes on the instrument, which means it plucks the D, A, and low E strings in various combinations. Usually, it alternates between two strings. For example, on a D chord in first position, the thumb would usually start on the (open) D string and then alternate to the A string, back and forth between the two in rhythm.
Start out with just the thumb. Put your chording fingers in position to play the D chord. With the thumb of your strumming hand, pluck the D string and then the A string on the 2 and the 4 beat. (Use a metronome and tap your foot or count in your head on a 1-2-3-4 count, slowly at first and pluck the D string on 2 and the A string on 4). Also, do it on the 1 beat only, so you pluck the D string on 1 and count 2-3-4, then the A string on 1 then the 2-3-4. You will see why in a moment.
A quick acoustic guitar fingerpicking exercise
Try this fingerpicking acoustic guitar exercise on the A chord, plucking the A string then the low E string. Do it on the E chord, first plucking the low E string then the A string (which is a B note in the chord.) Go ahead and do it with the G and C chords as well. On the C chord, it will sound best if you play the G note (3rd fret) on the low E string.

Push through the boring part
OK so do that for a while. Sure it’s boring, but necessary. Once you get pretty bleary-eyed doing that, change the pattern. Following the instructions above, pluck the first string on the 1 beat, strum the high 3 strings once on the two-beat, pluck the second bass string on the three-beat and strum the chord again on the four-beat. Do that for eight or sixteen beats on one chord, then switch to another. Pick chords that go together.
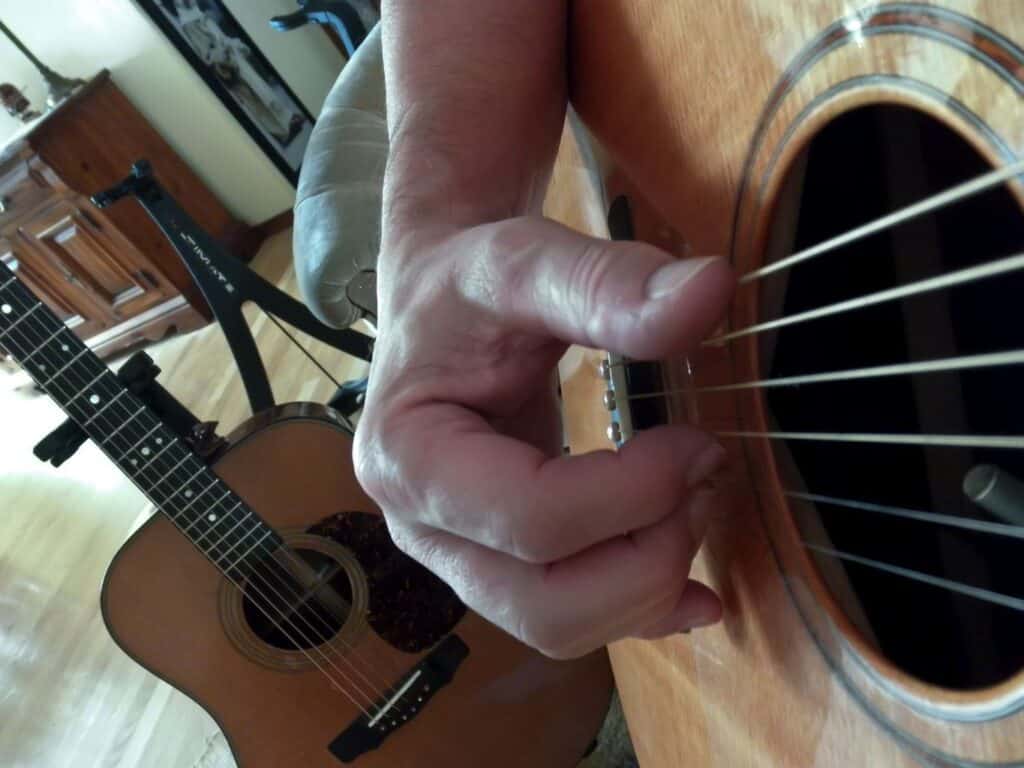
The next step is to pluck all three high strings instead of strumming them. Use your ring finger on the high E string, your middle finger on the B string, and your index finger on the G string. For this type of plucking, rest your fingers on or just a millimeter away from the strings, and bend the fingertips up by closing the top two knuckles on those fingers. Keep your pinky straight. Keep changing chords, and pick up certain fingers on the chording hand and hammer down or pluck off the strings as you strike them. Personally, when fingerpicking acoustic guitar, I like to use fingerpicks, and I recommend you to at least try some out.
The final level of fingerpicking acoustic guitar
Now you are ready to do the full level of picking. On a four-beat rhythm pluck the bass string of the chord, then the high E string with your ring finger, then the B string with your middle finger, and finally on the fourth beat the G string with your index finger. Do it again but pluck the alternate bass string with your thumb on beat 1. So to spell it out for the D chord, pick the D string with your thumb, the F# (on the high E string) with your ring finger on beat 2, the D (on the B string) with your middle finger on beat 3 and the A (on the G string) with your index finger on beat 4. Then start on beat 1 again picking the open A string with your thumb, and then repeat the pattern for beats 2, 3, and 4.
Counting is key
The important thing when starting out fingerpicking acoustic guitar, and in general, is to count those 4 beats as slowly as you can. For example, count 1 beat every 2 or 3 seconds. It may seem excruciating, but it is easy to speed up after a while. Also, hang out on one chord while concentrating on what the finger-picking hand is doing. The idea with the beats is to establish an even rhythm. As you get the rhythm going, for example, play 4 measures on the D chord, then 4 measures on the A chord, then repeat. Throw in 2 or 4 measures on the G chord. Pick up speed on these patterns as you feel more and more comfortable.
As I said above, if you already know the basic chords in first position and can switch them in time with the beat, try raising and hammering a finger (like the chording finger on the high E string in a D chord) or adding a pinky on the chording hand (playing the G note on the high E string in a D chord to make the suspended 4th). It is so much fun to fool around when fingerpicking acoustic guitar. There are so many beautiful sounds to experiment with as you perfect your style.
Fingerpicking acoustic guitar
One of the things I enjoy most is to do a song like “4 and 20” by Stephen Stills, where you have to pay attention to the thumb going back and forth between the two bass notes (lower the low E to a D bass note) while also concentrating on the high notes. I guess you piano players are used to splitting your brain concentration in half because you’ve got two different things going on, one with each hand.
Finally, don’t lock yourself into the above fingering pattern once you get better at it. Don’t force yourself to always use all four fingers all the time. But start out that way, because after you get the rhythm going with all four fingers humming along it sounds full and melodious. Fingerpicking acoustic guitar is a really fun thing to do, Enjoy!