Fret buzz is one of the most common guitar problems. Thankfully, it’s quite simple to solve, too. Today, we’ll look into what causes fret buzz, how much is too much, and most importantly – how to fix fret buzz by yourself.
Table of Contents
What’s Fret Buzz?
Fret buzz (also known as string rattle) is an unwanted sound that appears when the string hits and rattles against one or more of your frets. It usually happens when you fret a note, but you could also experience it on an open string.

Every Guitar Should Have Fret Buzz
Because of how guitars are built, every guitar has fret buzz or intonation issues. That’s just physics. So, how to determine how much fret buzz is acceptable? If it’s an electric guitar, just plug it into a clean amp and play it. If you hear the buzz through the amp, you have too much. Acoustics tend to have considerably less fret buzz than electrics. That’s because the action there is higher, and the strings are thicker.
If you want to lower your action but already hear buzzing, try using thicker strings.
As a rule of thumb, the lower your action, the more fret buzz you’ll experience, and the higher the action, the more intonation problems you’ll have. From here, it’s just a matter of balancing between them. You can’t have your action set super low and expect no fret buzz at all.
What Causes Fret Buzz?
As I said earlier, fret buzz happens because the string hits one or more of the frets on a guitar (or other similar instruments such as ukuleles, banjos, mandolins, basses, etc…). It can happen for many reasons, such as poor setup, worn-out parts, and even bad technique. All of which, we’ll touch on and solve today.
Doesn’t it Require Seeing A Guitar Tech or a Luthier?
In some extreme cases, you might want to take your guitar to a professional. But in most cases, you can identify and treat minor guitar problems by yourself. After gaining some confidence, you can (and should) even start setting up your guitar yourself.
How to Fix The Most Common Causes for Fret Buzz?
After you accept the fact that fret buzz is something you should learn to live with, to some extent, if you have too much of it, we’ll see how to identify what causes it and how to fix fret buzz on your guitar.
Truss Rod
Truss rod adjustments scare guitar players with no guitar maintenance experience, and for a good reason. But as long as you adjust it moderately, you have nothing to worry about. Just limit your adjustments to an eighth to a quarter of a turn each time. Once you get it right, the road toward setting up your own guitar is very short.
How to Check if the Fret Buzz is Because of the Truss Rod?
To determine whether the buzzing came from a poorly set truss rod, we’ll do a tap test. This test is very simple and part of any guitar setup.
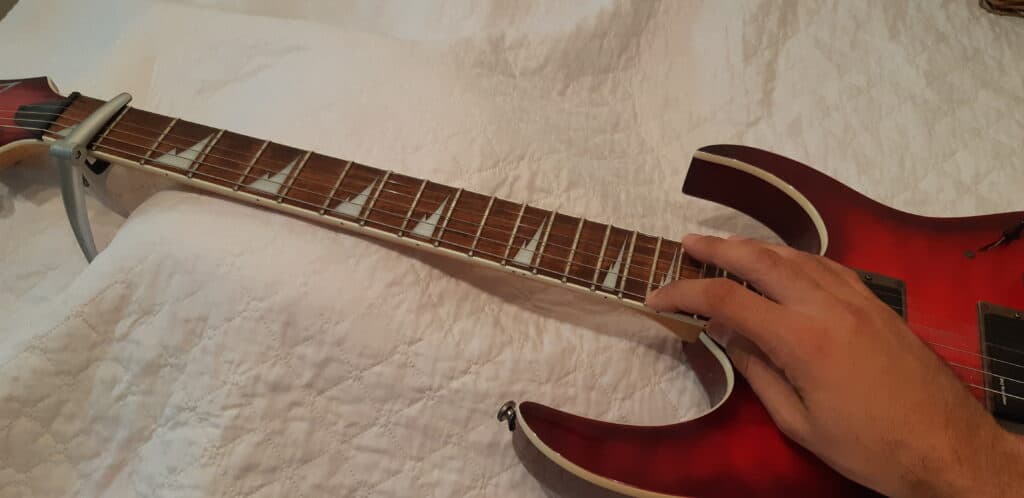
An easy way to check the relief of the neck is to press an acoustic where the neck meets the body and on the first fret (you can use a capo, too), and try to tap somewhere in the middle. We want to hear a tiny metal tap sound, indicating that the string has some space to move around and vibrate freely.
How to Fix a Poorly Set Truss Rod
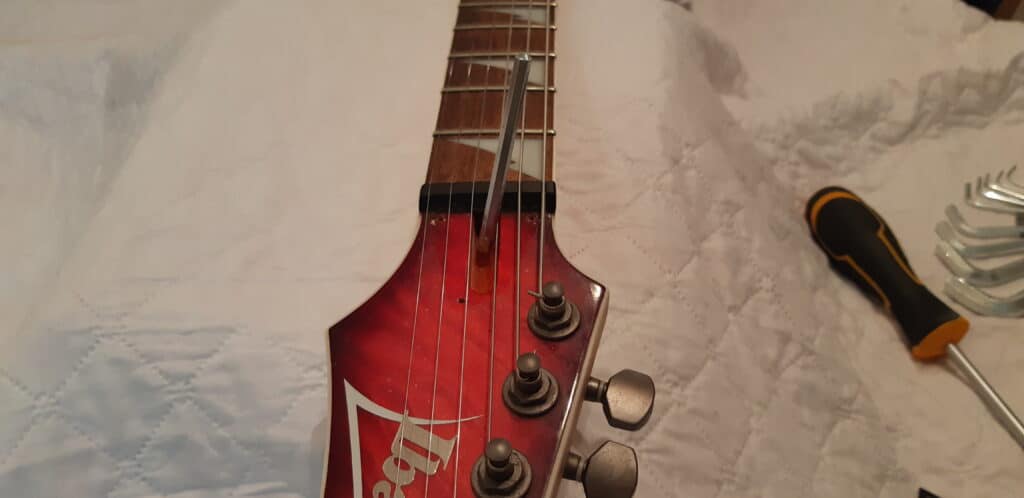
If all you got from your tap test is a muted tiny metal click or no click at all, you need to relieve the truss rod. To do that, take an Allen wrench or a truss rod wrench and turn it to the left.
Worn-Out Frets
Most guitar frets are made of Nickel, which is pretty soft. And even if yours are made of stainless steel, they won’t resist the pressure from the string forever.
How to Check if the Fret Buzz is Because of Worn Frets?
If your guitar is buzzing on a certain fret and not on those below or over it, your problem is that your frets are most likely worn-out.
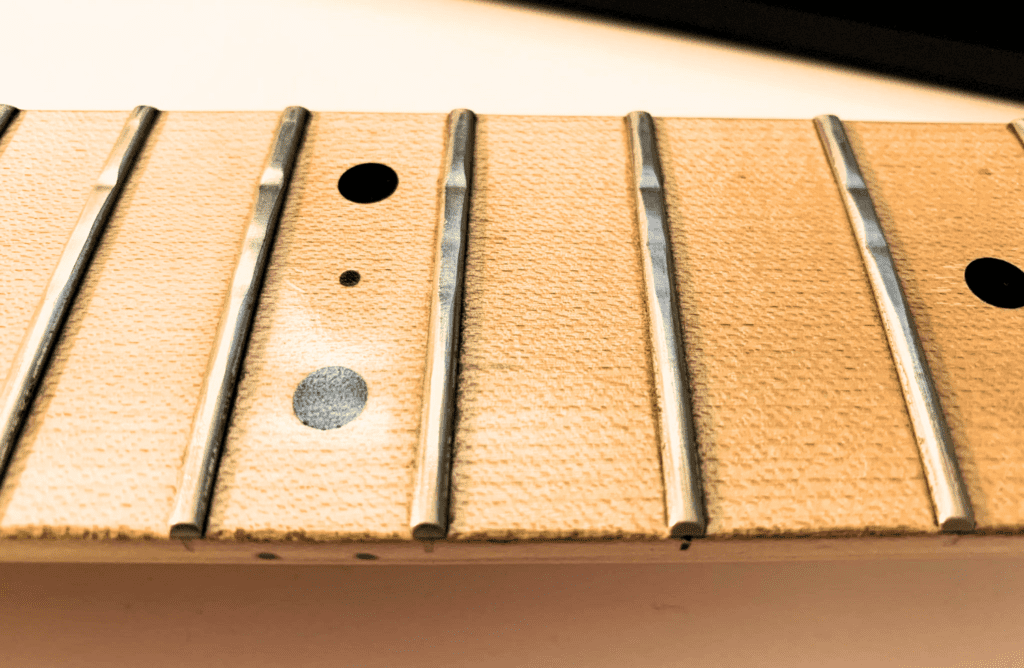
When you have a dent in your frets, the string gown down lower than it should. It causes the string to hit the above frets when plucked or strummed.
How to Fix Worn-Out Frets
To fix fret buzz that resulted from worn-out frets, we’ll need to dress them. You can take your guitar to any professional to do it for you, as it might be a little scary. It’s not complicated, but I get why you might not want to do it yourself.
If you decide to do it yourself, remove the strings and straighten the neck as much as possible (using the truss rod). Get a fret leveler and stick some sandpaper on top of it (if it didn’t come with it pre-assembled).
Make a few passes until all the frets are leveled. Now, take a fret crowning file and go over the frets until they are perfectly crowned.
The Nut is Too Low
Many players don’t think of the guitar nut as a part that can wear down. In fact, plastic guitar nuts have a life span of 5-6 years at most. Assuming the guitar was played a lot. Having the nut (and especially the nut slots) lower than it should be, forces the strings to sit lower on the fretboard. It will also dampen the sound of your guitar. If your guitar has a zero fret that’s not worn out, you can skip this test.
How to Check if the Fret Buzz is Because the Nut is too Low?
To examine the nut, we’ll perform another type of tap test. This time, we’ll put a capo on the 3rd fret and tap on the 1st. We don’t expect a loud tapping noise as we do when we expect the truss rod, but it should be very clear, nonetheless.
How to Fix a Nut that’s Too Low?
Unfortunately, you’re gonna have to replace the nut. It’s not too big of a deal, and you can easily consider it an upgrade. Most nuts these days even come slotted, so it’s only a matter of removing the old one and putting in the new one instead.
Check out the part about replacing the nut in the about upgrading your acoustic, and in this article about upgrading your electric.
The Saddle or Bridge Are Too Low
Just like the nut, the saddle, too, needs to sit at a certain height to allow the strings to vibrate freely.
How to Check if the Fret Buzz is Because the Saddle or Bridge are too Low?
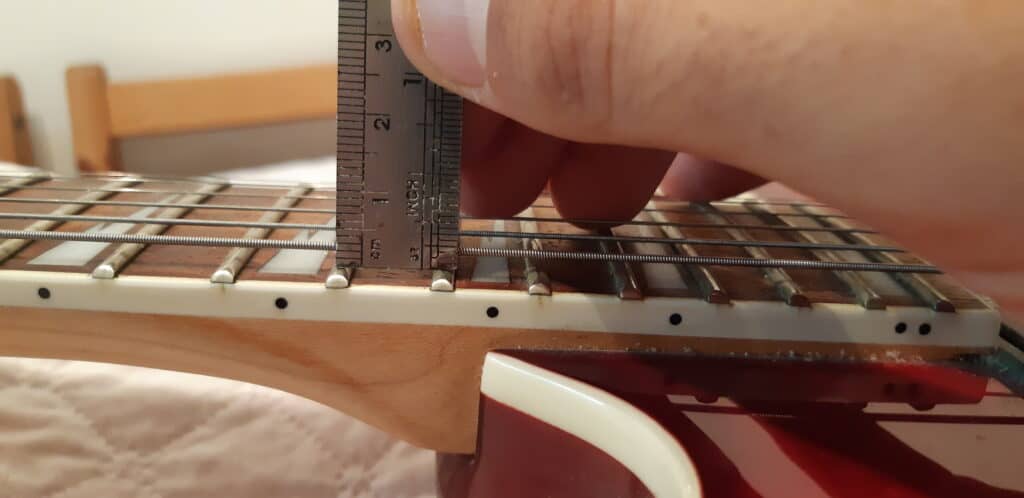
To see if your saddle or bridge is too low, we’ll take an action ruler (or any ruler, for that matter) and measure the action of the guitar. You can do it by measuring the distance between the bottom part of the string to the top part of the frets on the 12th fret (or on the 17th fret with a capo on the 1st).
The ballpark for acoustics is around 2-2.5mm on the low E string and 1.5-2mm on the high E string. On electrics, it’s a bit lower, at 1.6-2mm at the low E and 1.1-1.4mm at the high E.
How to Fix Fret Buzz Resulted From the Bridge to Saddle Being Too Low?
If you’re on an acoustic, unfortunately, you’ll need to replace the saddle. Just like the nut, replacing (or upgrading) your saddle is one of the simplest things you can do.
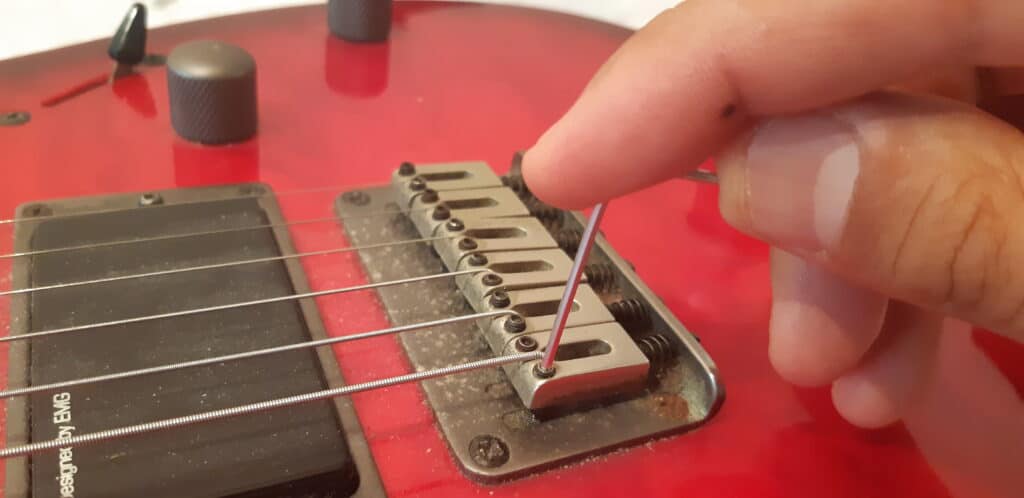
On an electric, it depends on the type of bridge you have. You can adjust the height of a Tune-o-Matic by adjusting the two screws on its sides. Floyd Roses have two hex screws controlling each string, and Teles are pretty similar, with one hex screw for each string.
Adjusting the height of your saddles might affect your intonation, too. So if that’s the cause of your fret buzz, you’d be better off setting up your guitar.
Finishing Thoughts
Today we learned how to fix fret buzz. 99.9% of the time, one of these will solve any fret buzz you might have. On the rare occasion that none of these helped, take your guitar to a professional.
If you have any questions, feel free to post them in the comments below.
If you liked this article, check out more similar articles in our guitar maintenance section or browse through our free guitar lessons.